Fast File Transfer Demo for Technical Sales using Aspera On Cloud
- 1 - Review Demo Scenario
- 2 - Create your Aspera on Cloud free trial account
- 3 - Installing Aspera Connect
- 4 - Renaming your Workspace
- 5 - Creating your Demo Files
- 6 - Creating IBM Cloud Object Storage (ICOS) Services
- 7 - Creating Microsoft Azure Blob Storage Services (Optional)
- 8 - Copying Access Key and Secret of your built-in node
- 9 - Defining your Demo Users
1 - Review Demo Scenario
| DEMO OVERVIEW | |
|---|---|
| Scenario overview | In this digital world, fast and reliable movement of digital data, including massive sizes over global distances, is becoming vital to business success across virtually every industry. The Transmission Control Protocol (TCP) that has traditionally been the engine of this data movement, however, has inherent bottlenecks in performance. This demo will show how to use Aspera on Cloud to move the world’s data at maximum speed. |
| Demo products | IBM Aspera on Cloud |
| Demo capabilities | File, Package, Activity, Automation, Admin, Cloud Storage Integration |
| Demo intro slides | Download the Introduction and Overview slides here. |
| Demo script | This demo script has multiple tasks that each have multiple steps. In each step, you have the details about what you need to do (Actions), what you can say while delivering this demo step (Narration), and what diagrams and screenshots you will see. This demo script is a suggestion, and you are welcome to customize based on your sales opportunity. Most importantly, practice this demo in advance. If the demo seems easy for you to execute, the customer will focus on the content. If it seems difficult for you to execute, the customer will focus on your delivery. You will use a dedicated workspace with an Aspera on Cloud trial account. |
| How to get support | Contact rosorio@br.ibm.com or jaym@us.ibm.com regarding issues with setting up and running this demo use case. |
2 - Create your Aspera on Cloud free trial account
2.1 Access the Sign up for IBM Aspera on Cloud page.
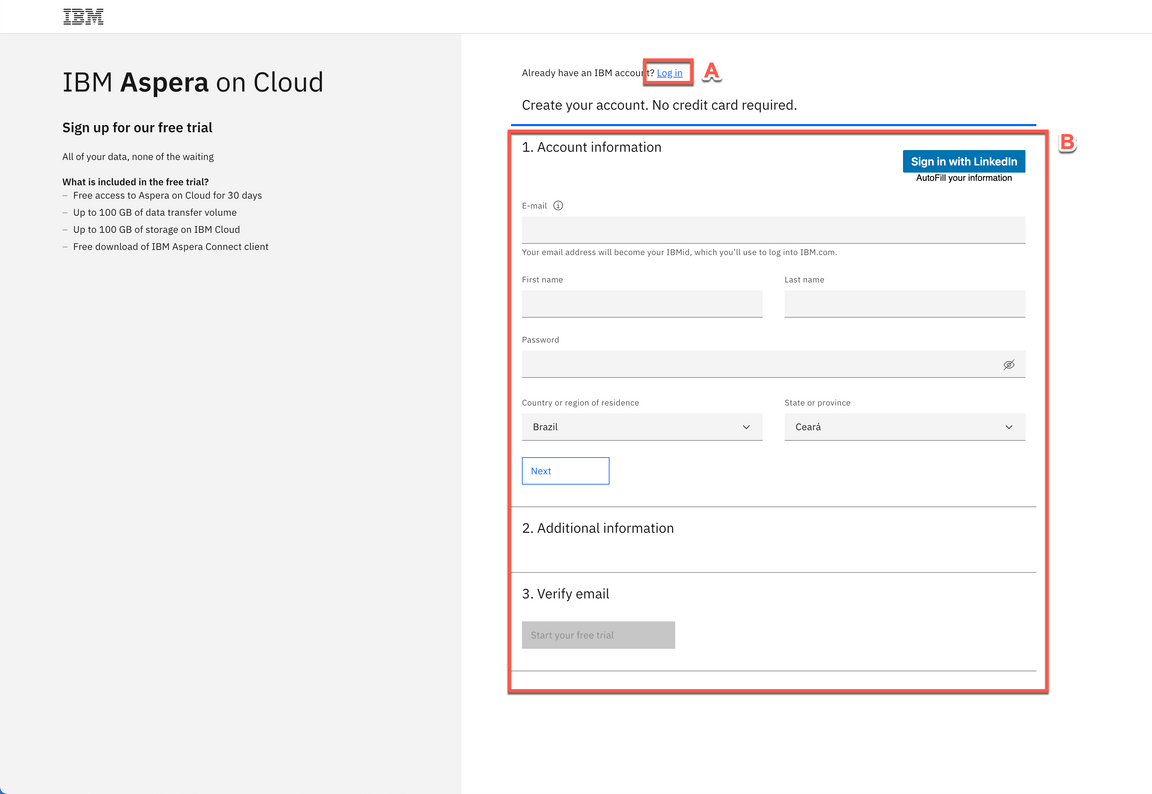
2.2 On the Sign up for our free trial page, if you already have an IBM account, click Log in (A). If not, complete the registration form (B).
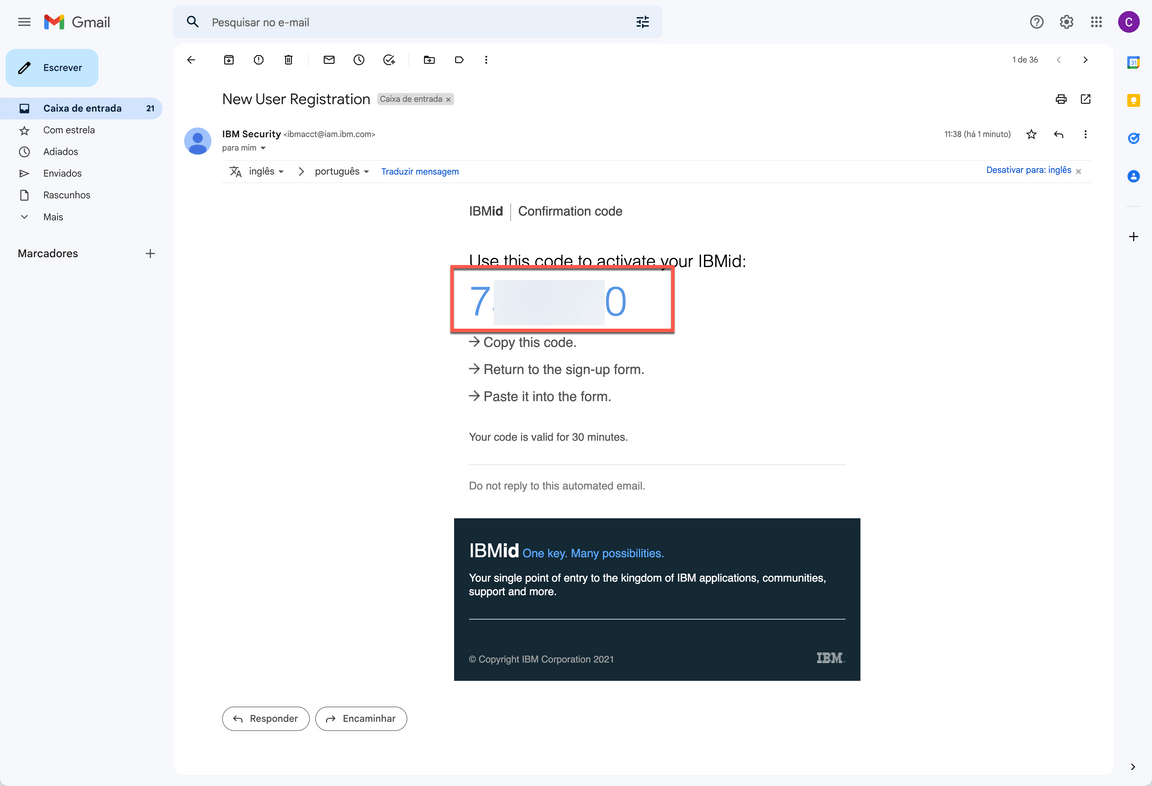
2.3 At the end, you need to verify your email. Open your email and copy the 7 digit code.
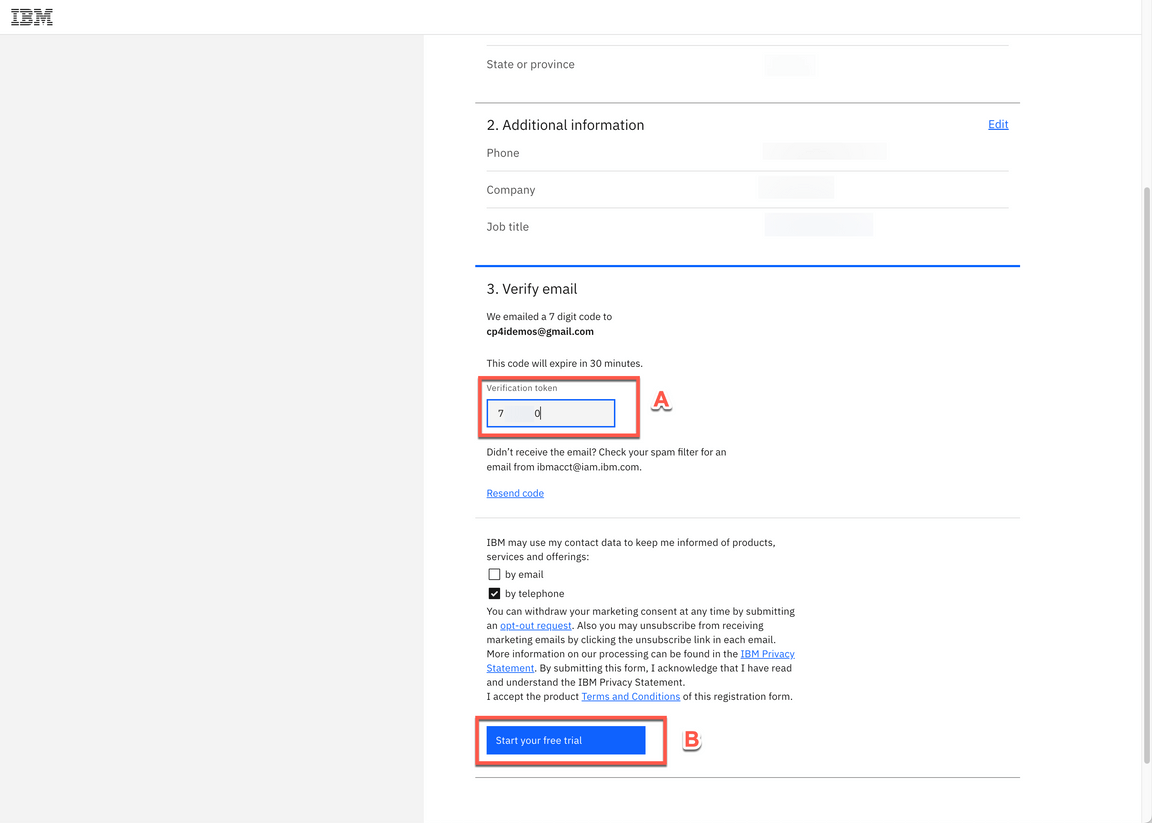
2.4 Return to the Sign-up form and paste the 7 digit code into the form (A). Then, click Start your free trial (B).
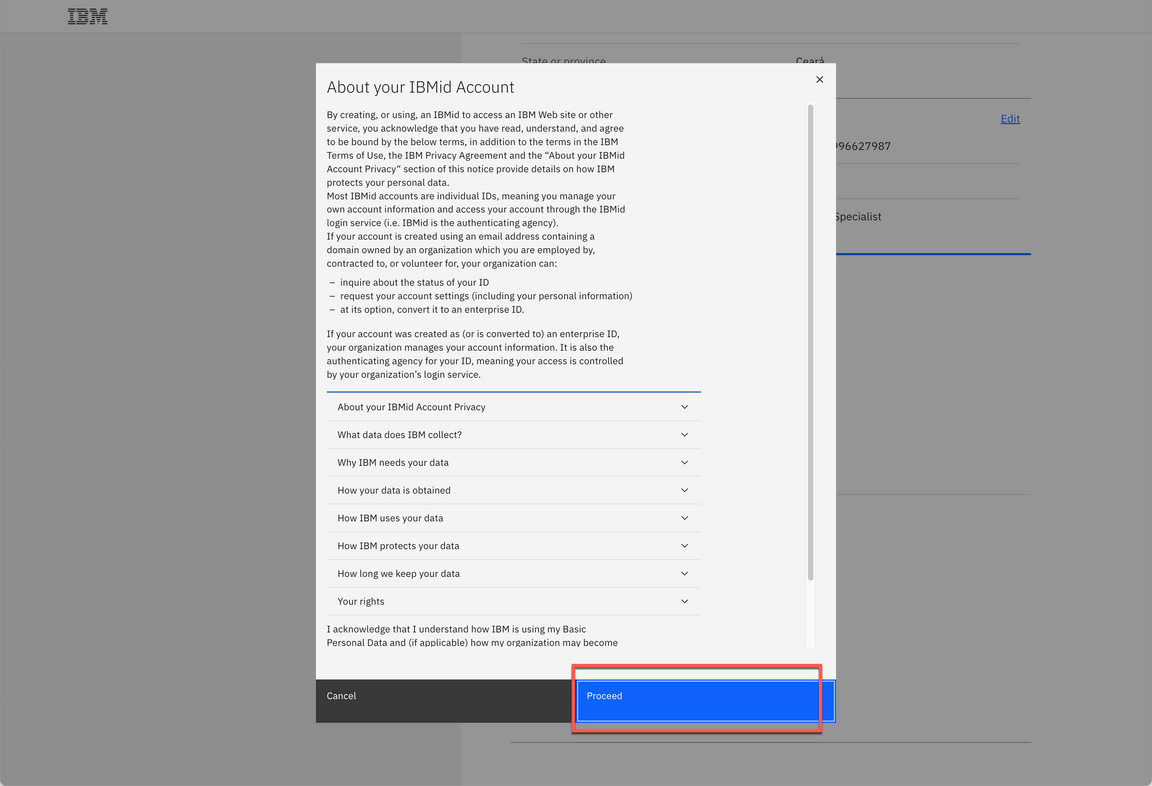
2.5 In the About your IBMid Account, check the information there and when ready, click Proceed.
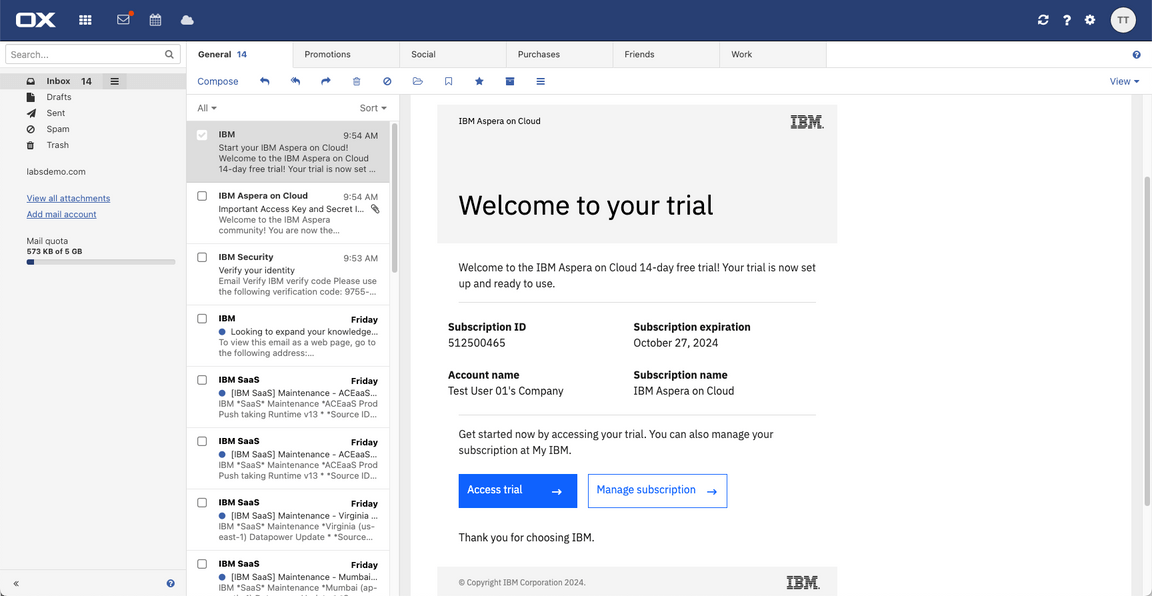
2.6 Now, back to your email, you should have an email from IBM Aspera on Cloud. Open this email and click on Access trial.
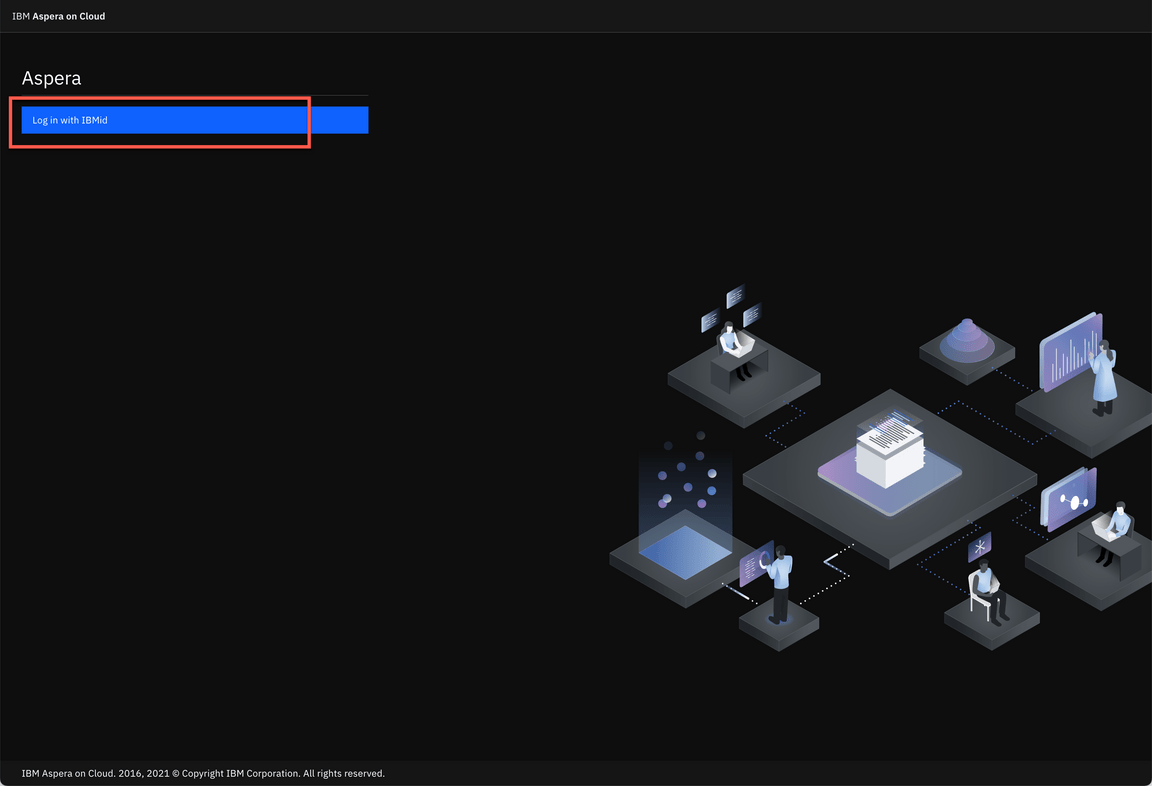
2.7 Click Log in with IBMid. Then, go ahead and use your new IBMid credentials.
3 - Installing Aspera Connect
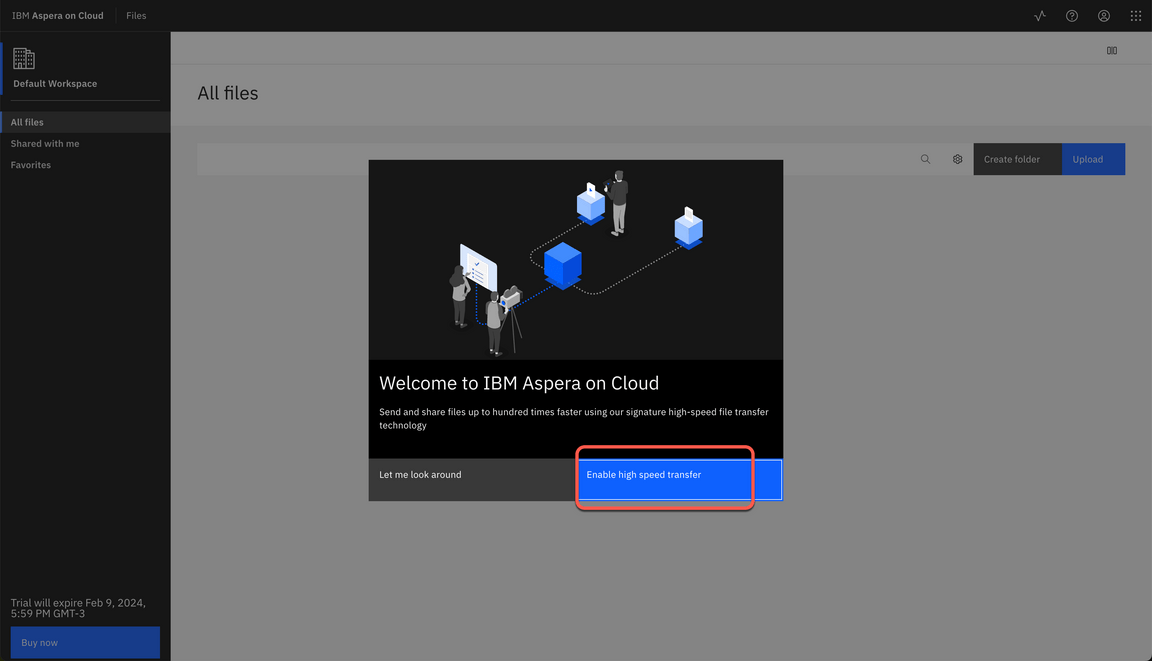
3.1 First time you access the Aspera on Cloud, you should see the Welcome dialog, click Enable high speed transfer.
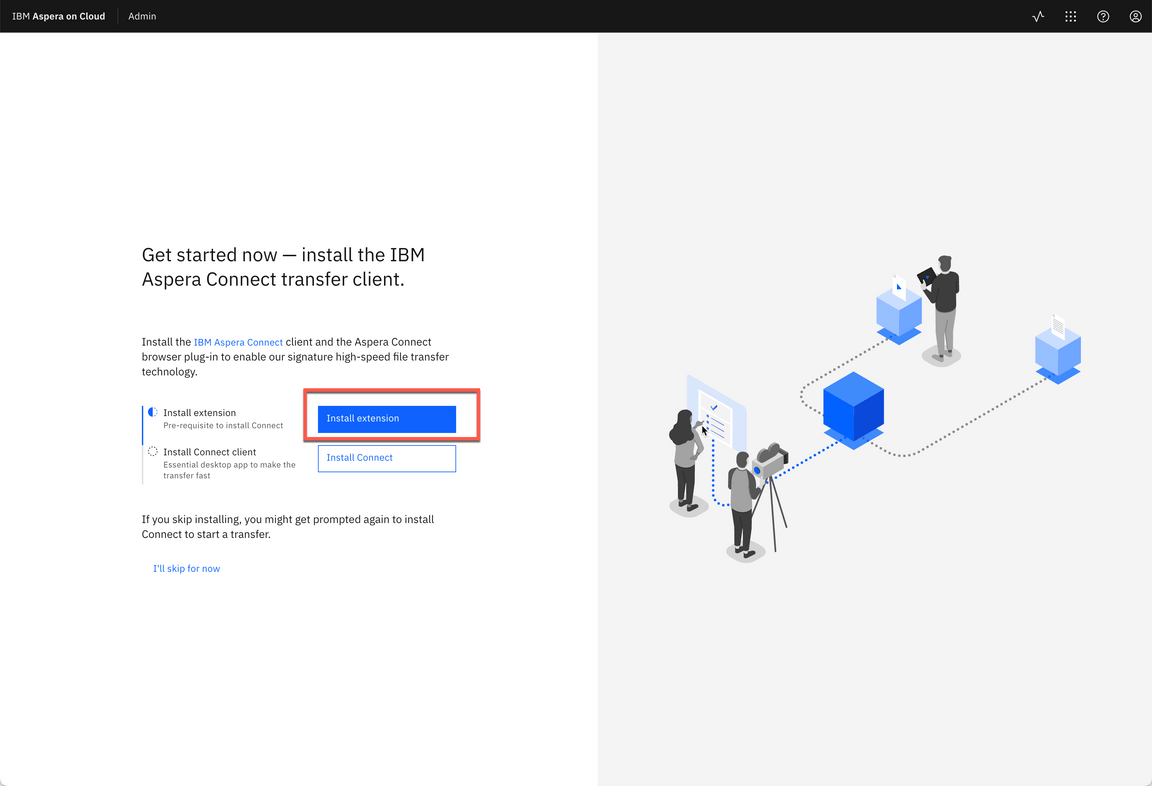
3.2 Now, you will see a page, asking you to install the IBM Aspera Connect transfer client. You need to install both the Aspera Connect browser plug-in and the Aspera Connect client. Let’s do it! Click Install extension.
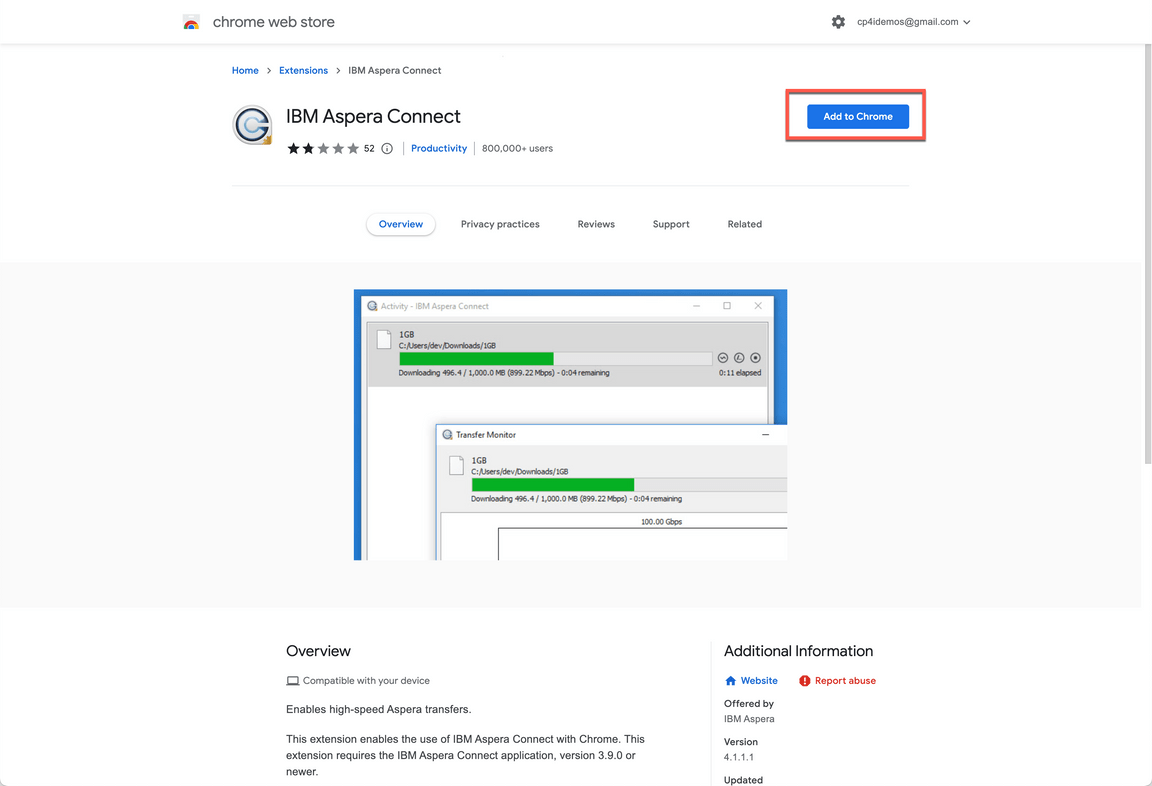
3.3 Go ahead, and follow the necessary steps to install the extension in your browser.
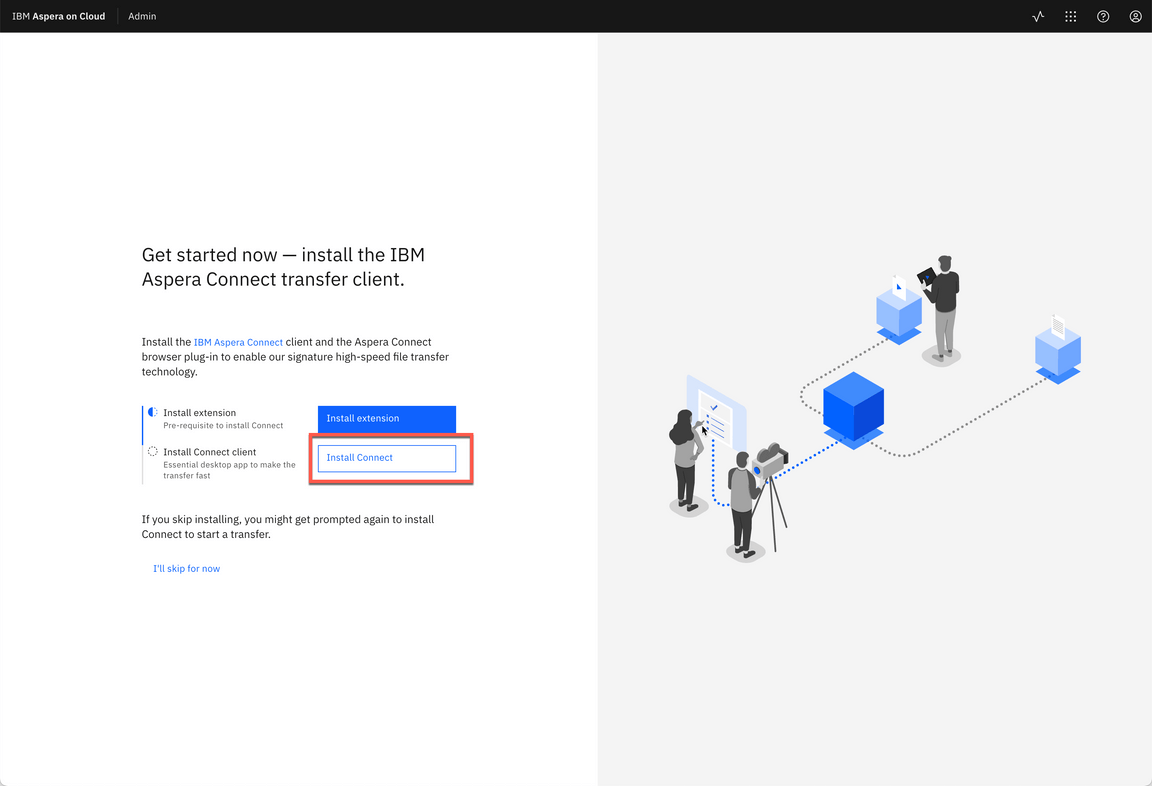
3.4 When done, click Install Connect to open the IBM Aspera Connect page.
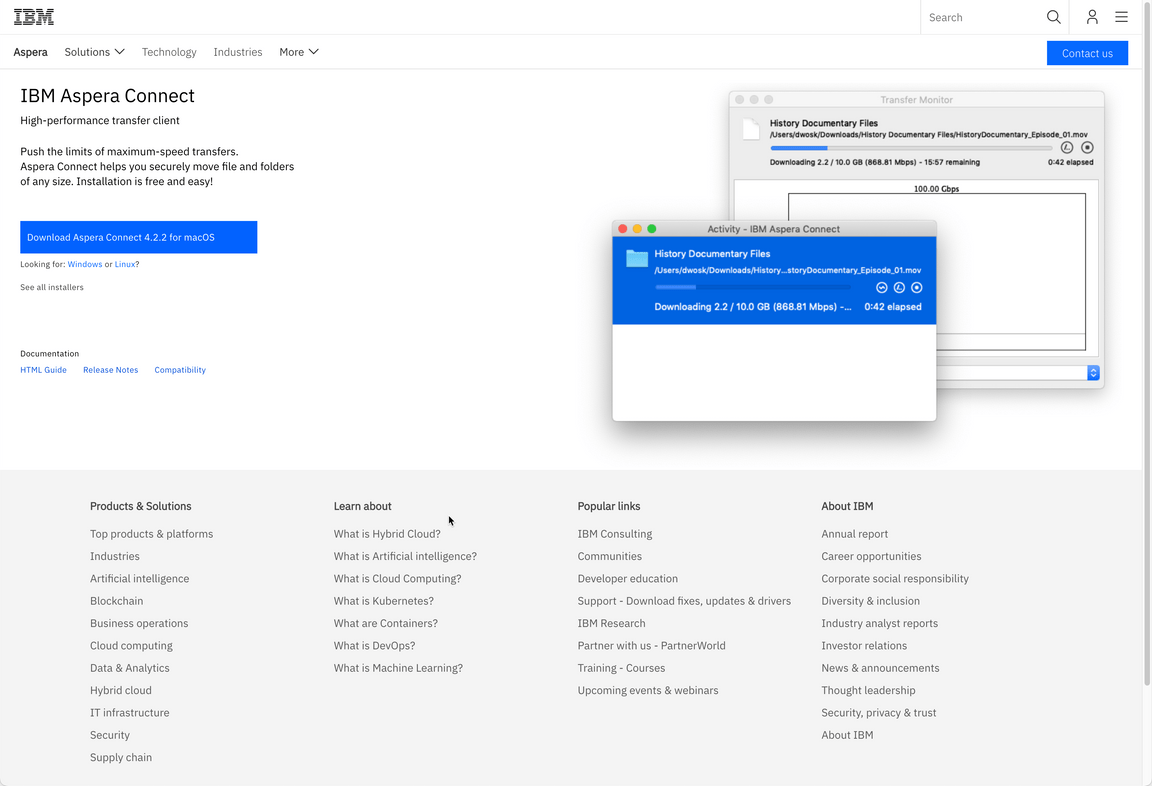
3.5 Go ahead and follow the necessary steps to install IBM Aspera Connect in your OS.
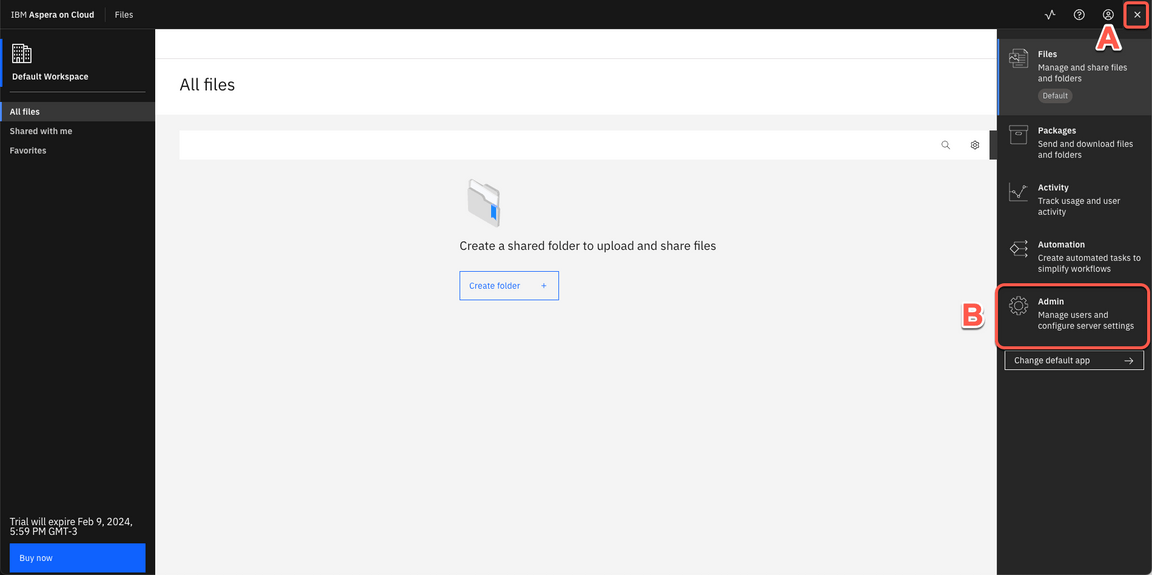
3.6 When done, return back to the Aspera on Cloud page. Now, you should be on the Default Workspace area on Files app. Before explore the Files app, let’s open the admin page. Open the App switcher menu (A), select Admin (B).
4 - Renaming your Workspace
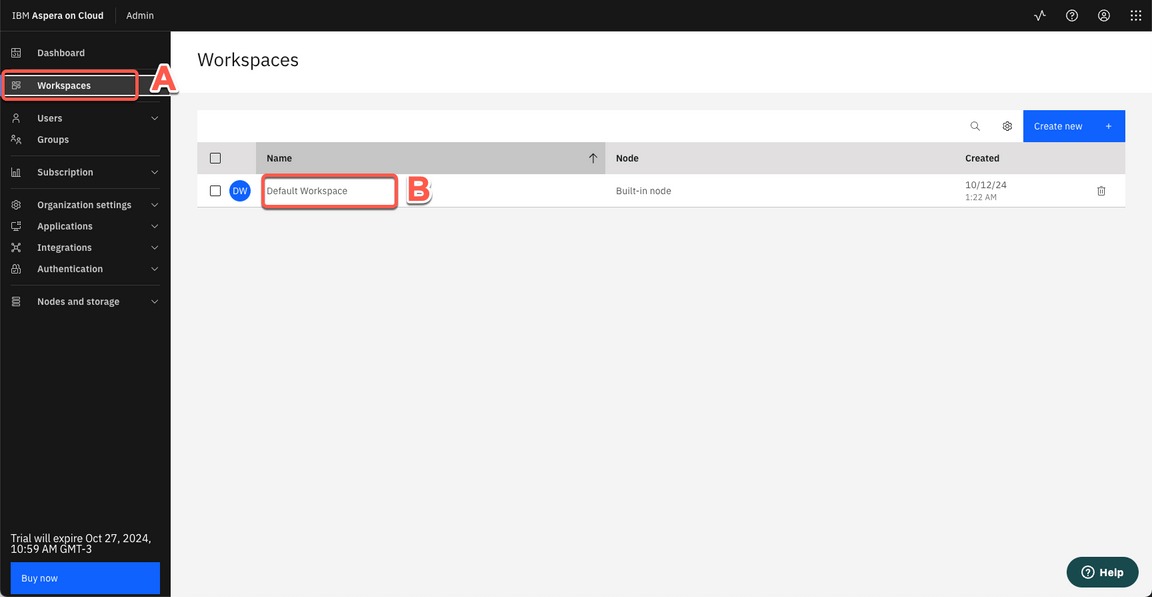
By default your first workspace is default. To have a more appealing demo workspace, let’s rename it.
4.1 Open the Workspaces page (A). Then click on Default Workspace (B) to edit it.
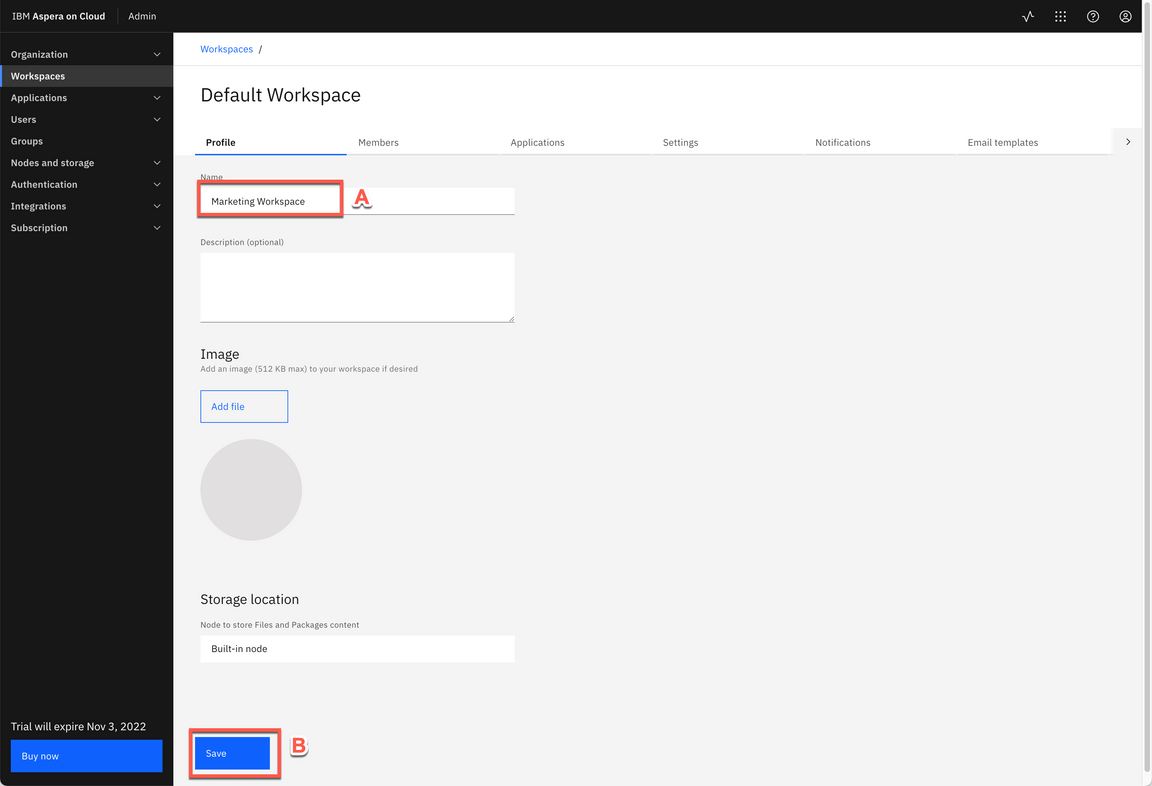
4.2 On Name field, change to Marketing Workspace (A). Then click Save (B).
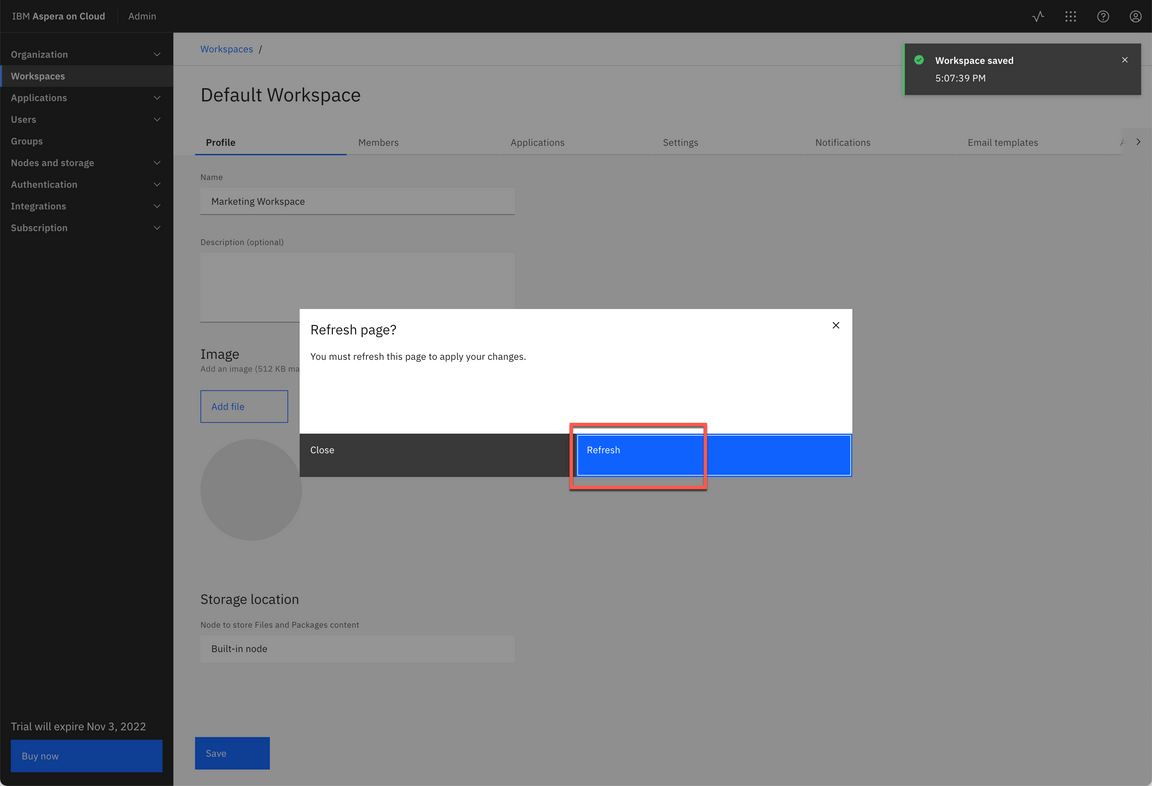
4.3. Click Refresh.
Great! Your workspace is ready for demo.
5 - Creating your Demo Files
As part of this demo, you will need to upload some files. You can decide the size of files that you will use in your Demo based in your network bandwith. One important point: Large files are good to show how fast is to transfer files in Aspera, on the other hands, you don’t want to stay in front of customer waiting a file to be uploaded. The recommendation is: Try first and define the best experience for your audience.
You can create your demo files by using your personal files. Another possibility is to download some dummy files from internet. There are multiple sites where you can download test files, this site is one example.
Below are the names and size of files that we are using in the demo script. Feel free to recreate them. It is a good practice to keep them in a folder with easy access during the demo.
| File Name | File Size |
|---|---|
| A-B Testing Fall 2022 | 10 MB |
| A-B Testing Summer 2022 | 10 MB |
| Campaign Launch Video | 100 MB |
| Campaign Logos | 10 MB |
| Summer Campaign | 200 MB |
| Mobile Campaign | 200 MB |
| New Site Project | 10 MB |
6 - Creating IBM Cloud Object Storage (ICOS) Services
In this section and next, you will configure two Object Storage services in different cloud providers to use in the demo to show file transfer between different cloud providers. Because of configuration simplicity, in this demo, you will use IBM Cloud and Microsoft Azure. Microsoft enables you to use object storage service as part of free tier / trial account. The same is true with Google Cloud Platform and AWS. You are welcome to use any Object Storage service. IBM Cloud Object Storage, you need to request a TechZone COS service. Let’s do it!
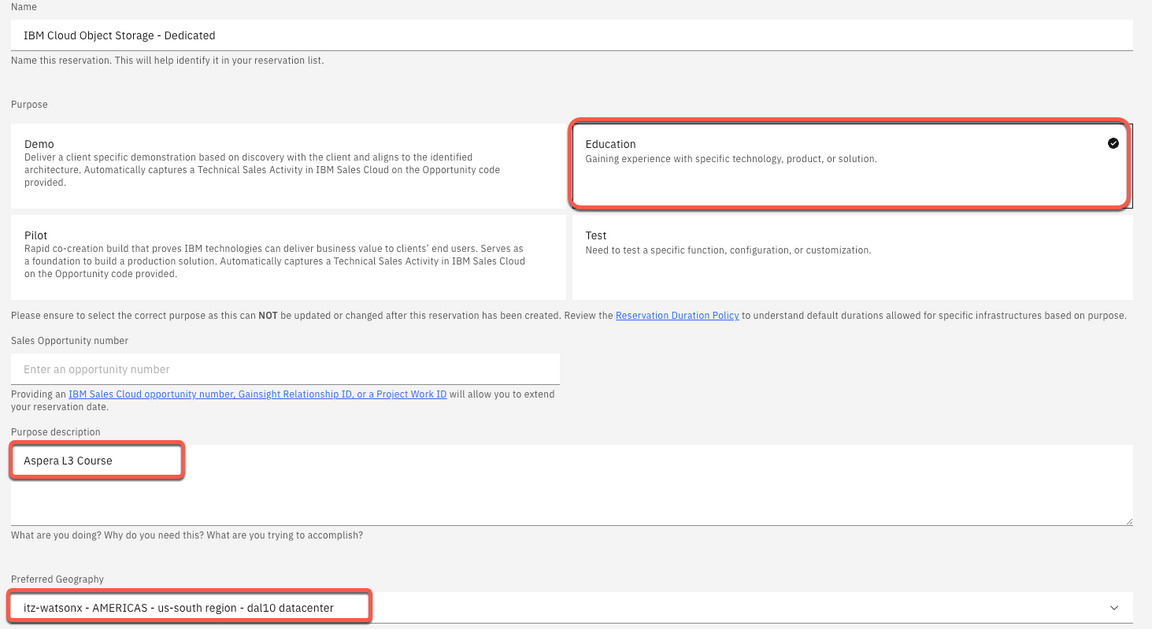
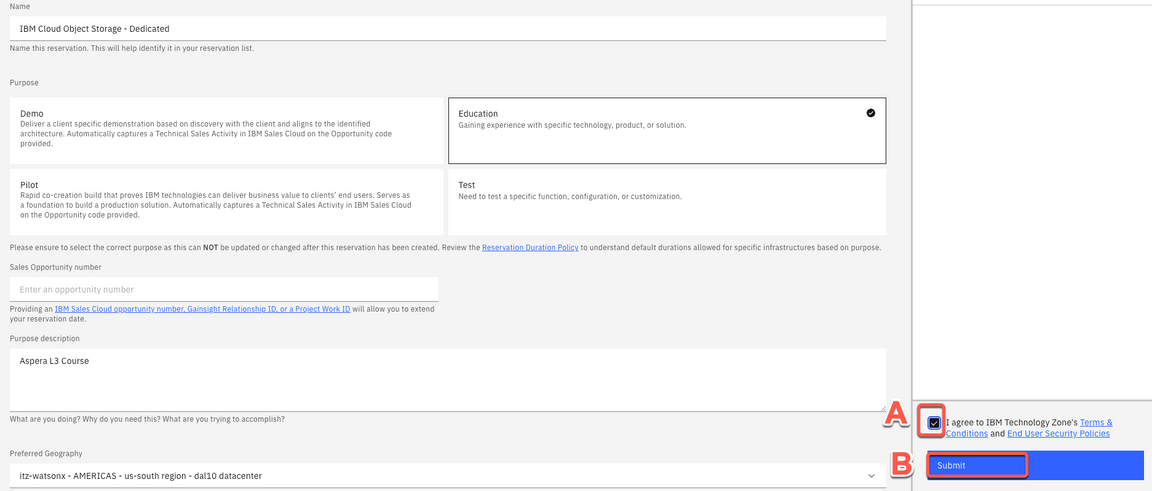
6.1 To request a TechZone Cloud Object Storage service, go here and complete the form with the follow details.
| Field | Value |
|---|---|
| Purpose | If you are doing the L3 course, select Education. If you are a demo, select:Demo and inform the Sales opportunity. |
| Purpose Description | If you are doing the L3 course, enter: Aspera L3 Course. If you are delivering a Demo, enter the Demo details. |
| Preferred Geography | You are welcome to select the preferred Geography |
6.2 Agree with the TechZone Terms and Conditions (A) and click Submit (B).
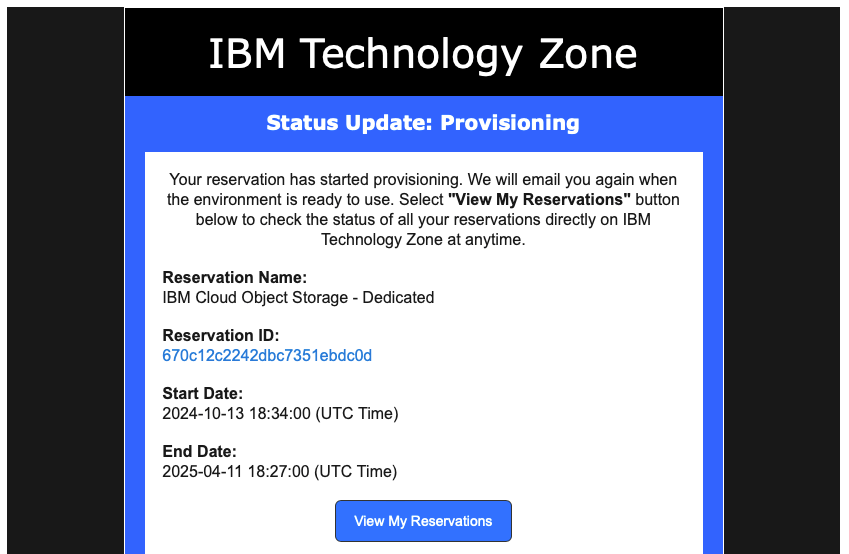
6.3 You will receive an email confirming the instance is provisioning.
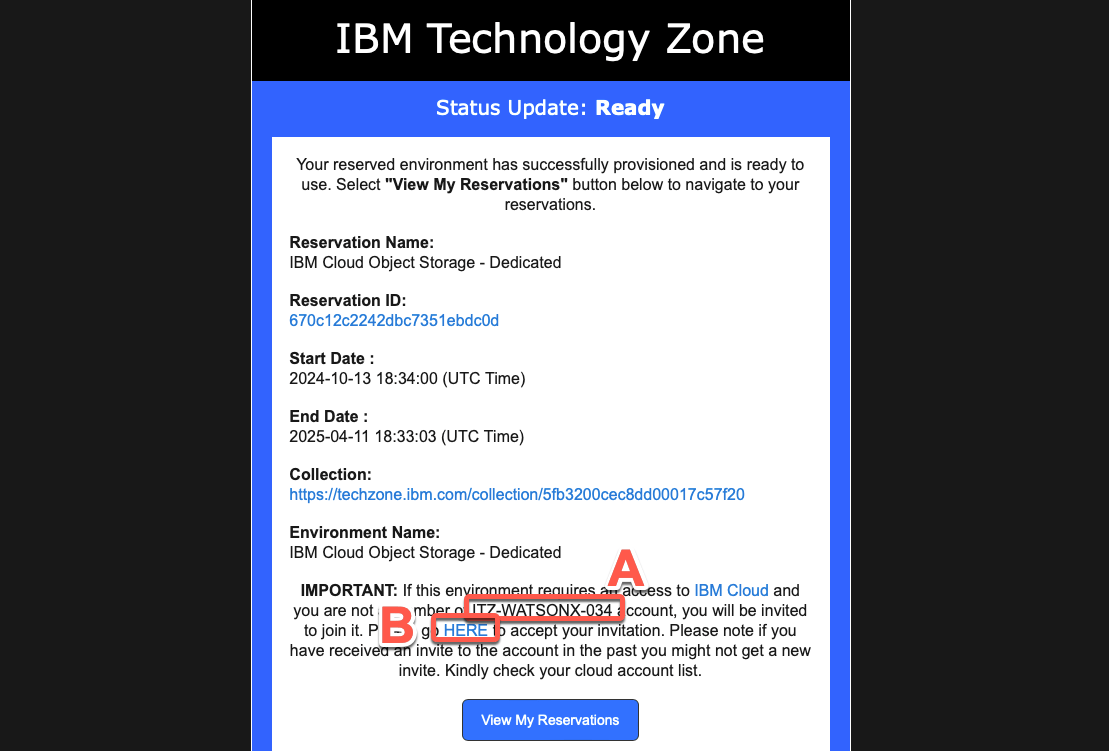
6.4 You will receive a second email once the environment is provisioned. You should expect this to take between 5 and 20 minutes. Now the status update changed to Ready. The COS service is created in a specific TechZone (TZ) IBM Cloud account, you can check the account name in this email (A). If you have not done so (in a previous reservation) you will need to click on the notifications page link (B) to go and accept the invitation.
6.5 Clicking on notifications page brings you to a login page where you need to provide your IBMid (and may have to log in with your credentials if you have not already done so). Then you will see the Action required item. Click on the item (A). Then click Join now.

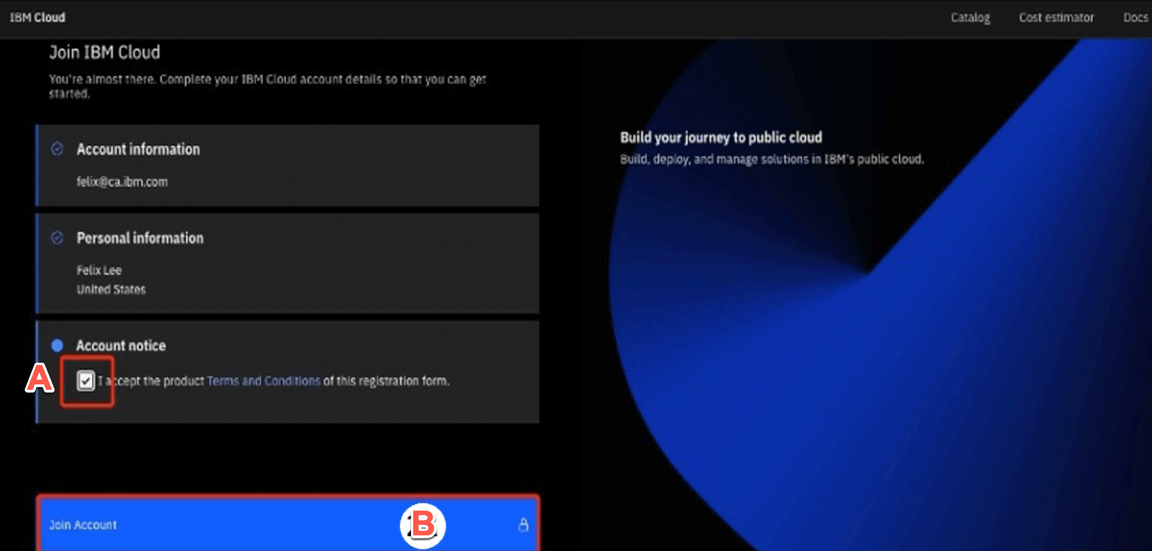
6.6 You will now be sent back to the IBM Cloud login page. Use your IBMid to log in. You are asked to join the TechZone account. Accept the Terms and Conditions (A), then click Join Account (B).
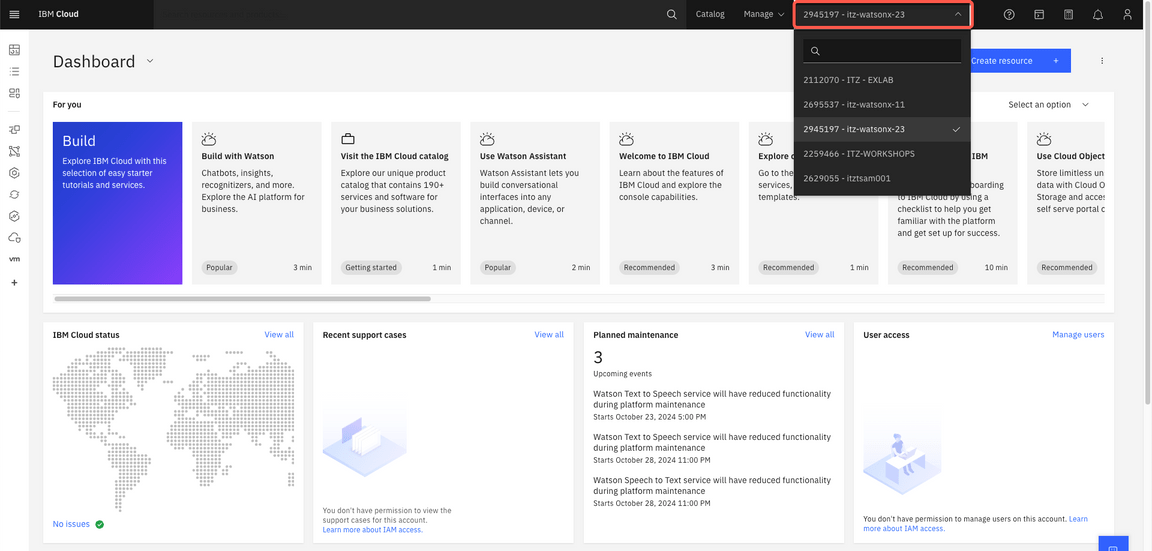
6.7 When you log in, ensure you are using the right account. Assuming that you have accepted the invitation, you should have an itz-watsonx -n account. Go to the menu bar and click on the icon to slide open the list of accounts available to you, and ensure that you select the account that was assigned to you from your current TechZone reservation. You can always check your reservation email to find the account name.
6.8 On IBM Dashboard, open your Resources list.
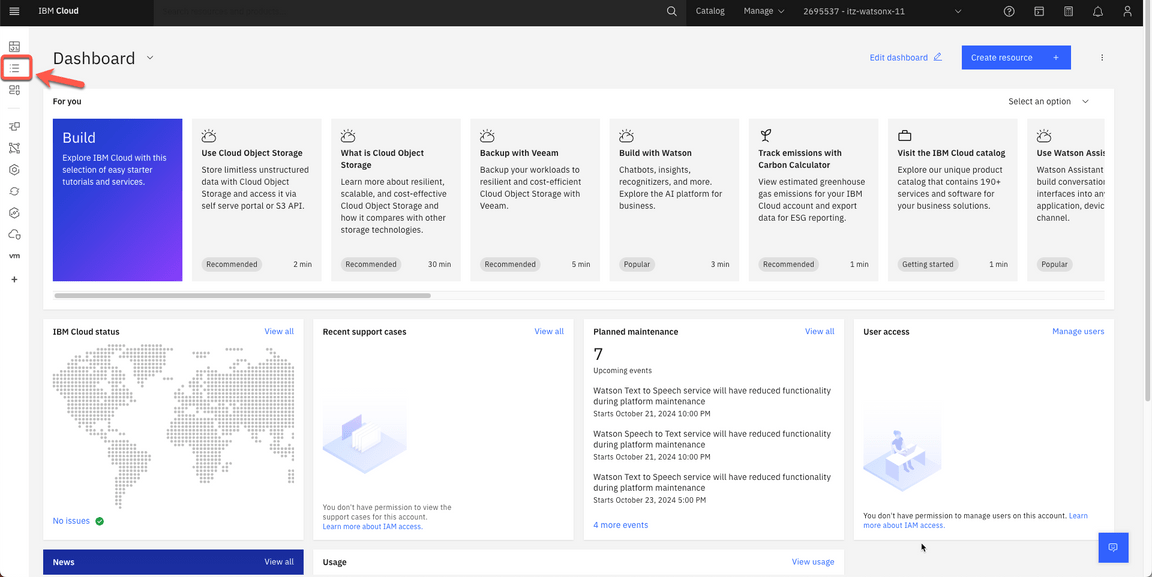
6.9 On Resources page, open Storage section and select your Storage service.
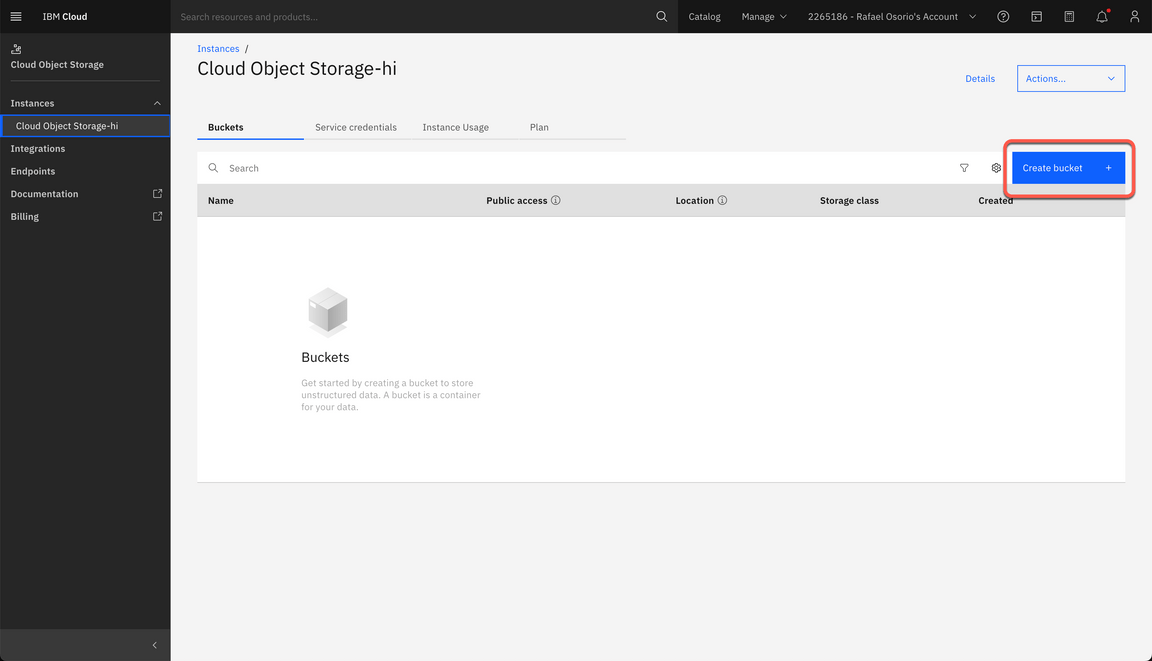
6.10 On your Storage Instance page, click Create bucket.
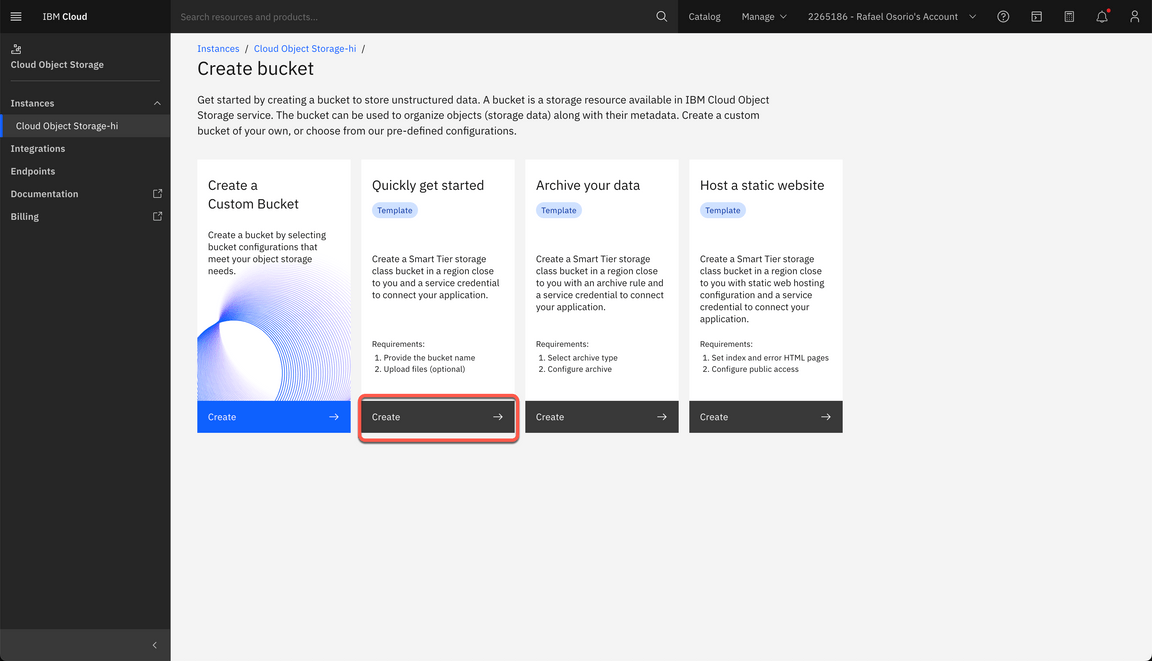
6.11 Select Quickly get started to use a predefined bucket.
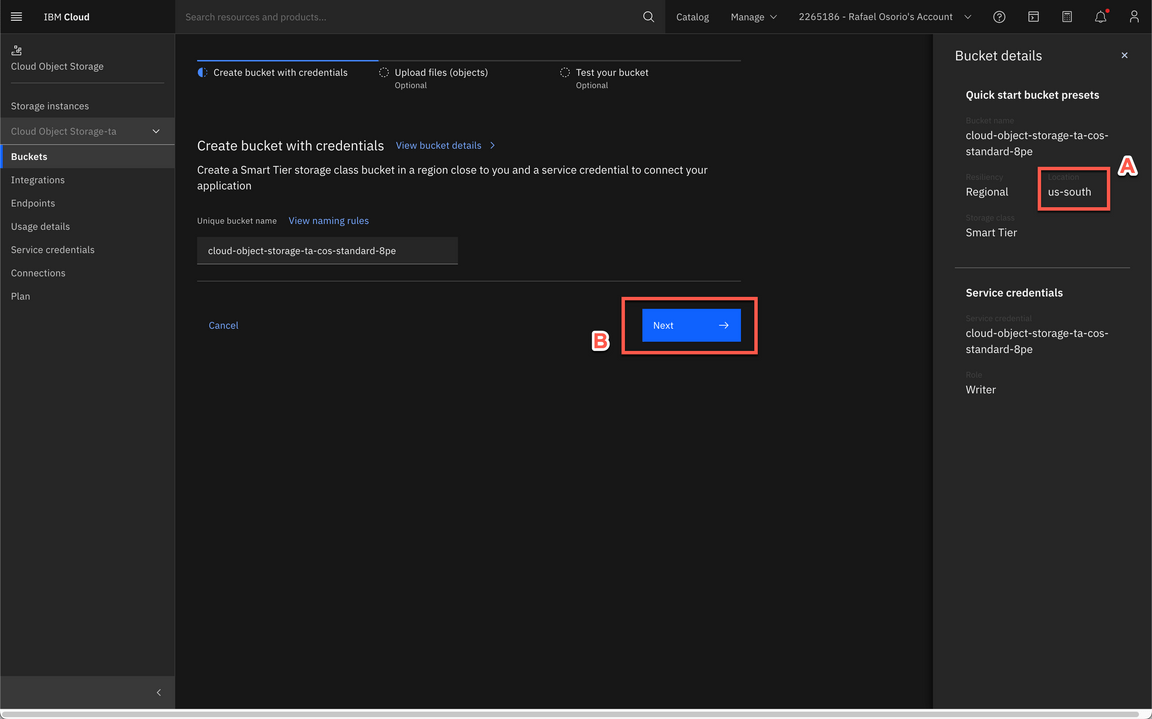
6.12 Your IBM Cloud storage must be in a region that is supported by the Aspera on Cloud transfer service. To view the supported regions, check the list here. Check that you are using us-south (A) and click Next (B).
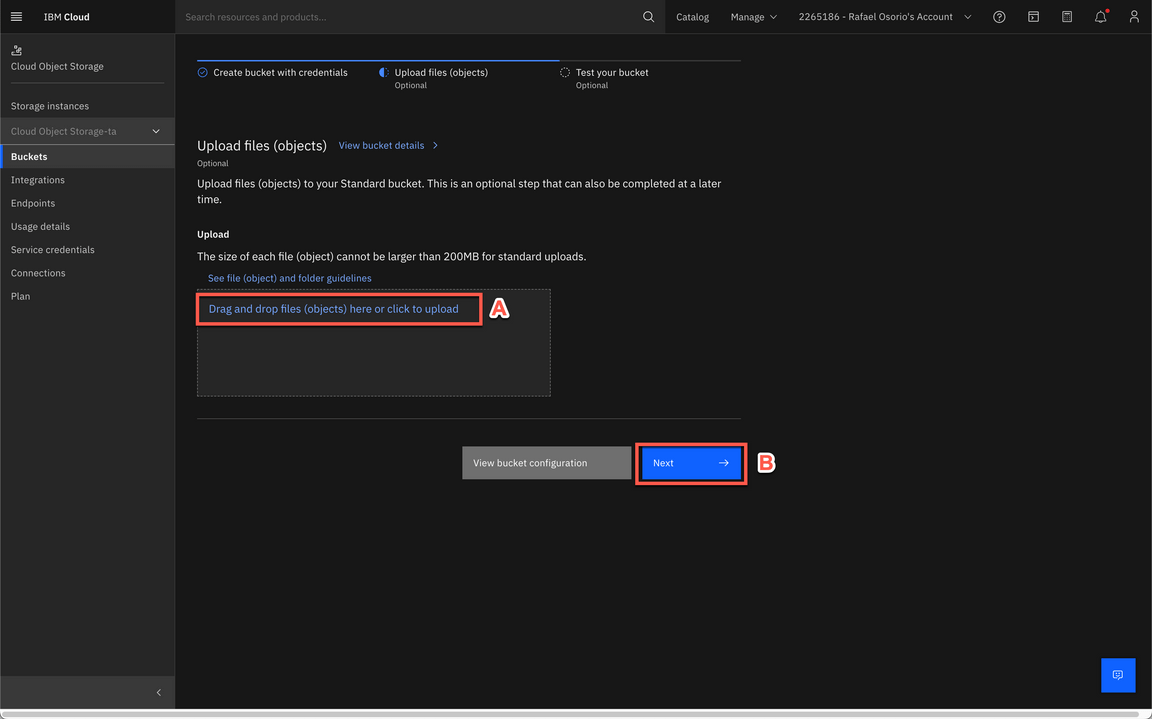
6.13 Drag and drop a 50MB file (A) and click Next (B).
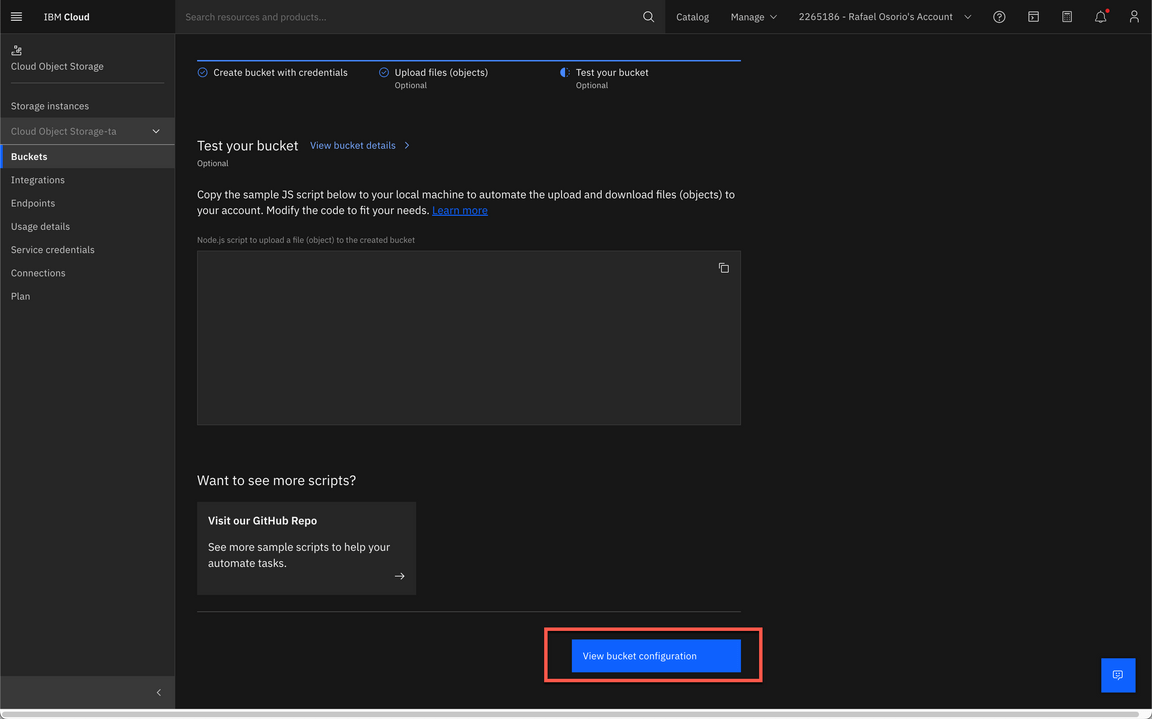
6.14 On Test your bucket page, click View bucket configuration button.
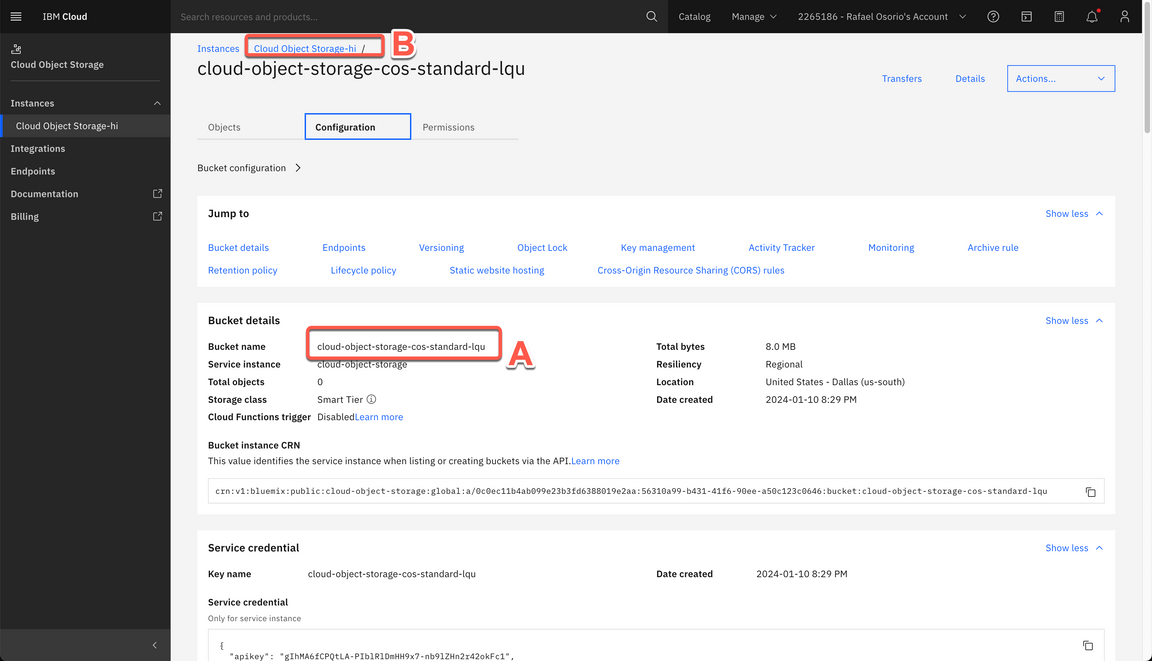
6.15 On the Bucket configuration page, take notes of your Bucket name (A), you will need that during the demo to integrate your ICOS bucket with Aspera on Cloud. On the Breadcrumbs, click on your new Storage instance link (B).
6.16 Open the Service credentials tab.
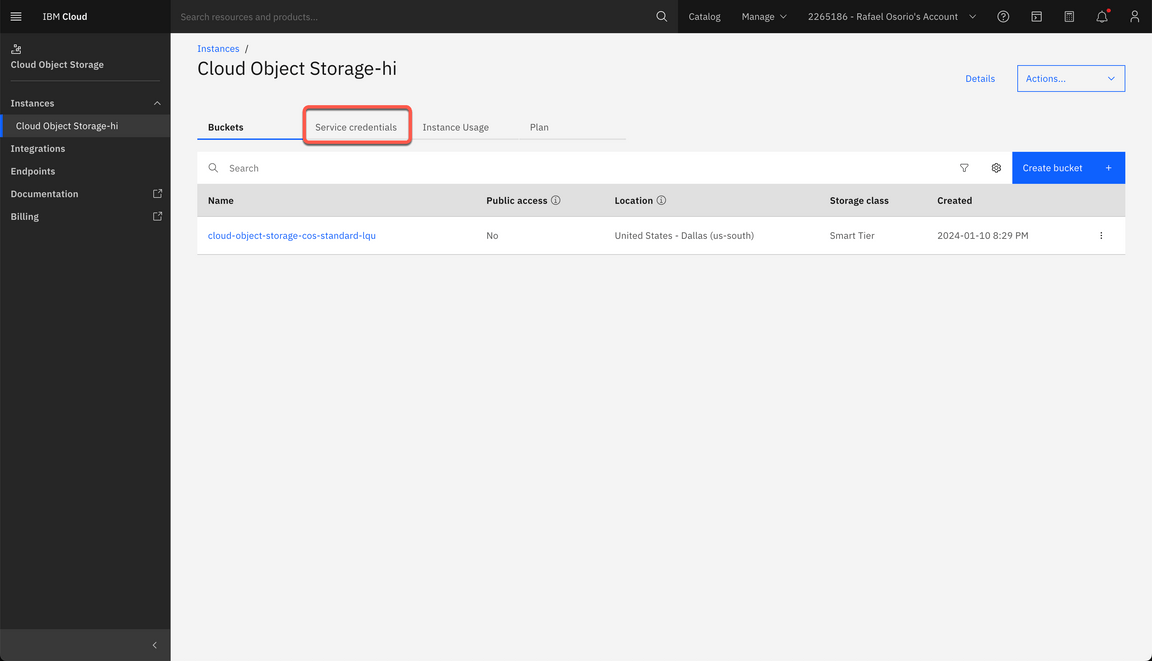
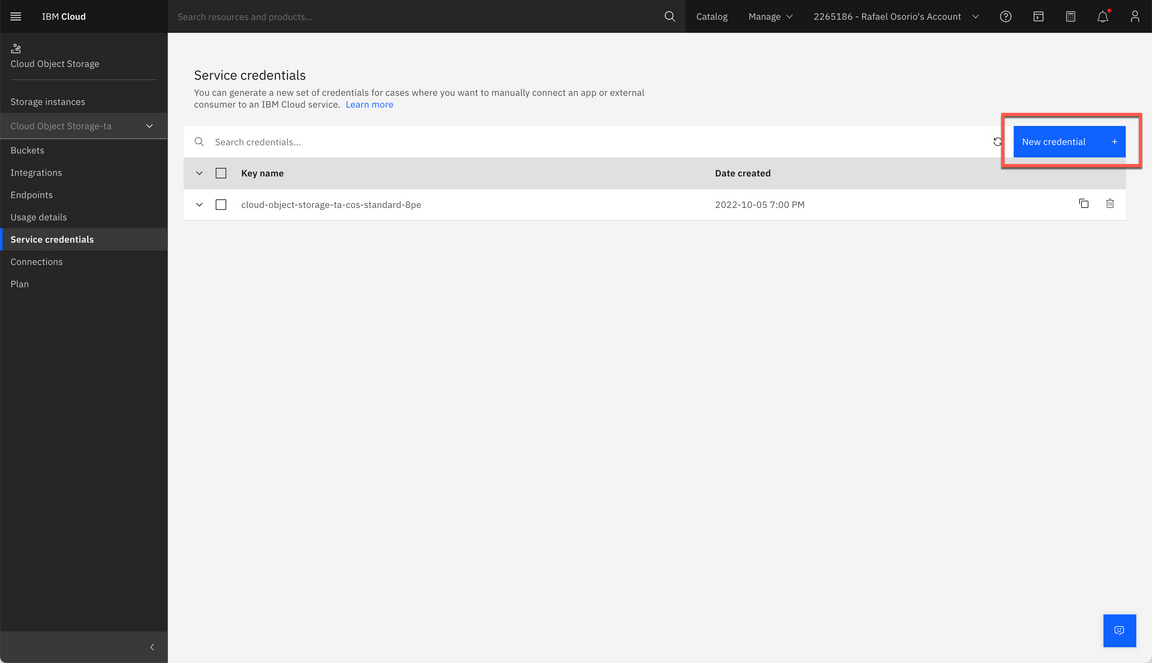
6.17 You need to have HMAC credentials for the IBM Cloud bucket. Let’s create one! Click New credential.
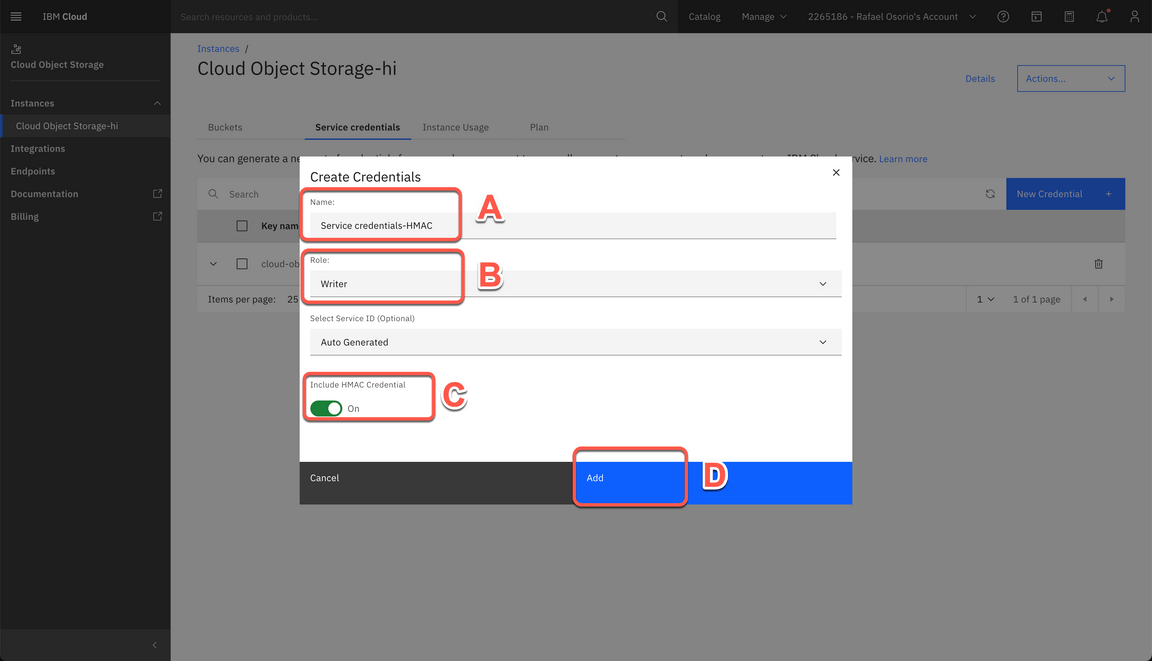
6.18 Enter Service credentials-HMAC as Credential Name (A). Select Writer as Role (B). Turn On the Include HMAC Credential (C). And click Add (D).
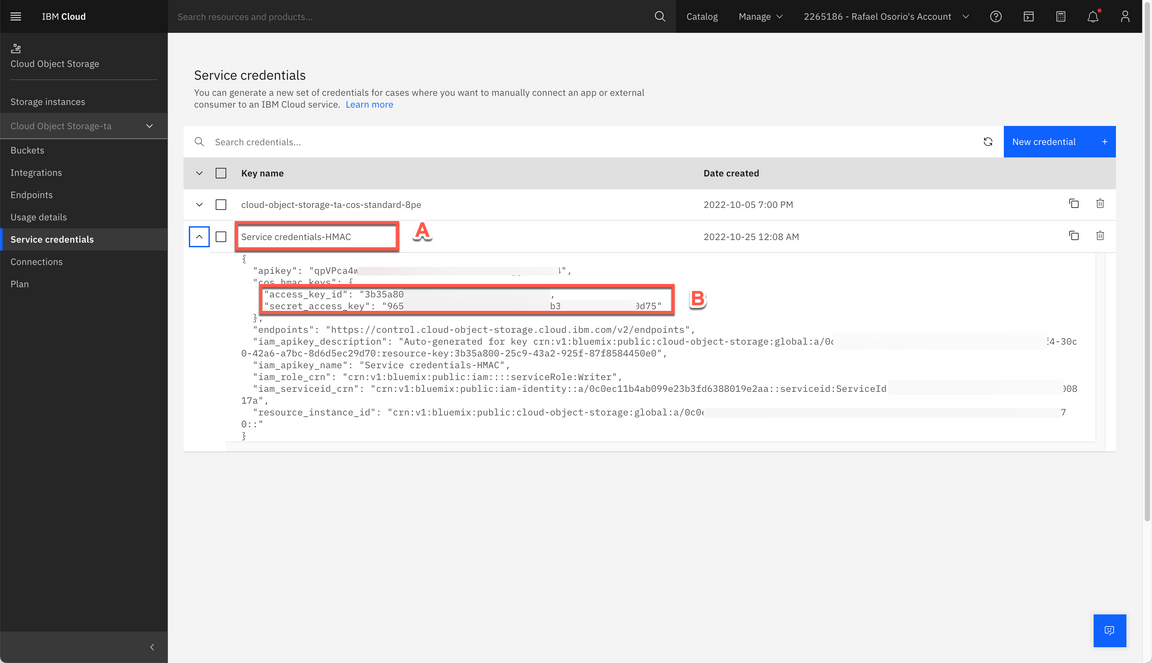
6.19 Click on Service credentials-HMAC credential (A) and take note of the access_key_id and secret_access_key (B). You will need both during the demo.
Great, your IBM Cloud Object Storage is ready for demo. Let’s prepare the second Storage bucket on a different cloud provider.
7 - Creating Microsoft Azure Blob Storage Services (Optional)
For the second storage bucket, you will need an acccount in a different Cloud platform. If you don’t have one, you can go ahead and create an Azure free account and use its free tier capabilities. However, you will need to enter a valid credit card. It is a temporary authorization and will not charge unless you move to pay-as-you-go subscription. However If you don’t want to create a free tier account, because you don’t want to enter your credit card, no problem! You can go ahead with this demo and ignore the last section of the demo script (Transfer files between different cloud platforms).
As previous described, here you will see how to create a Storage bucket in Azure Blob Storage. However, you are welcome to use a different Cloud platform, if you prefer.
7.1 If you have an Azure account, log in Azure Portal page.
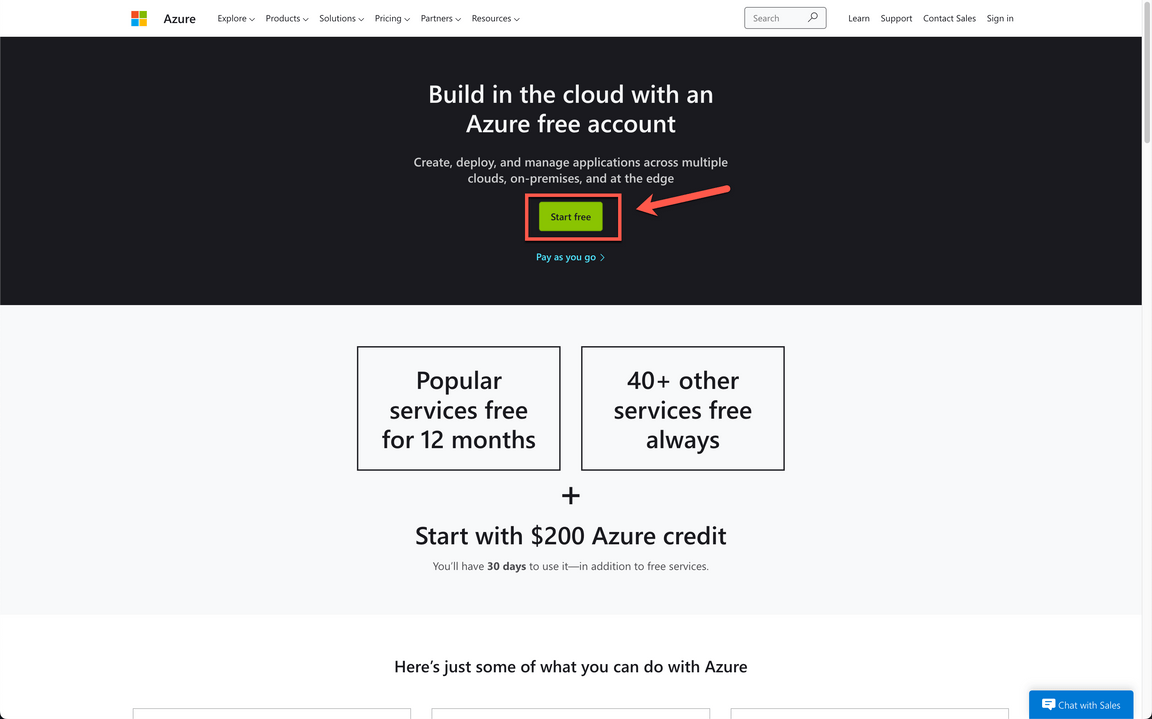
7.2 If not open the Azure free account page. Then click on Start free and follow the steps to create your free account.
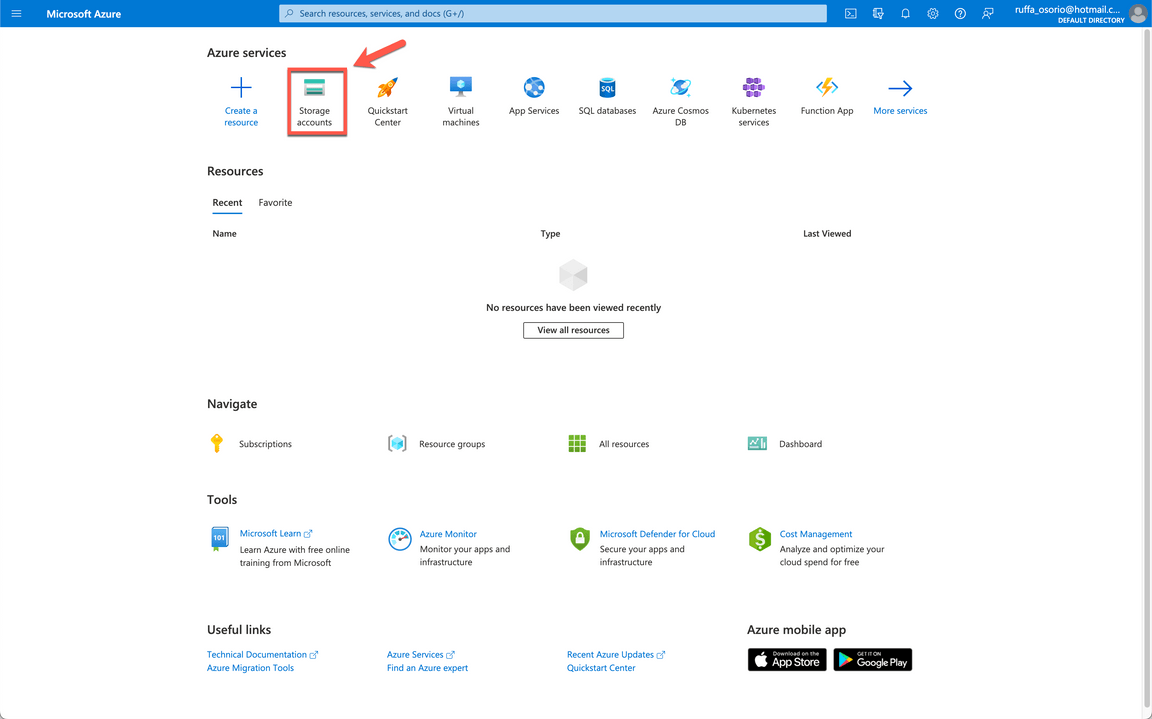
7.3 On Azure portal, on Azure services section, click Storage accounts.
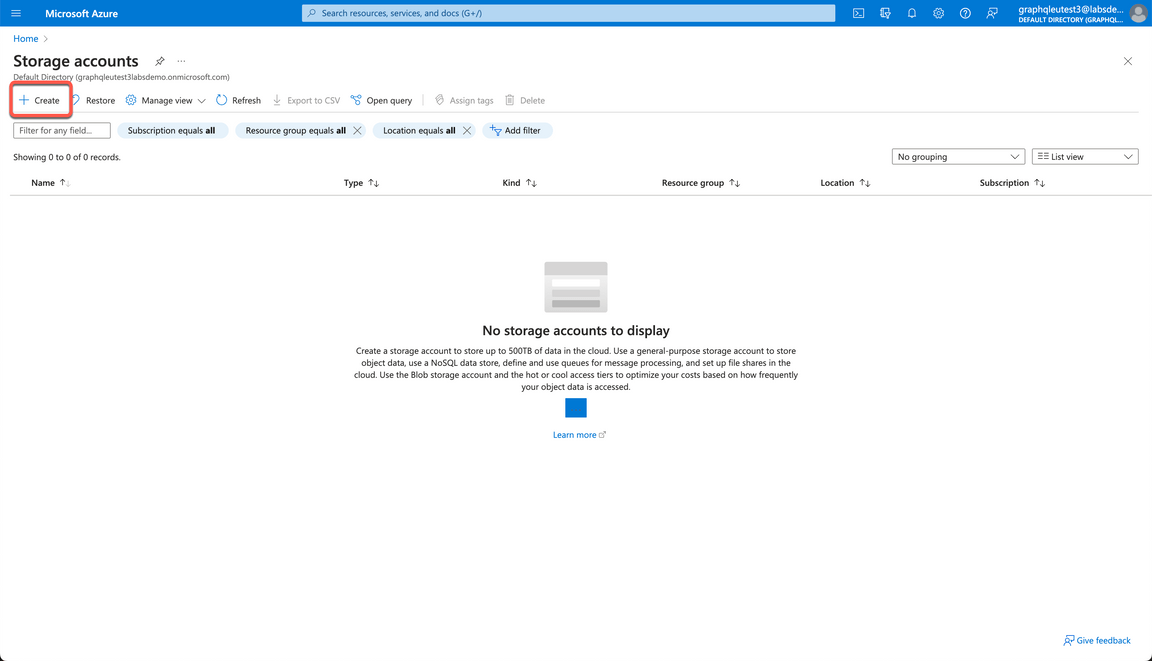
7.4 On Storage accounts page, click on + Create.
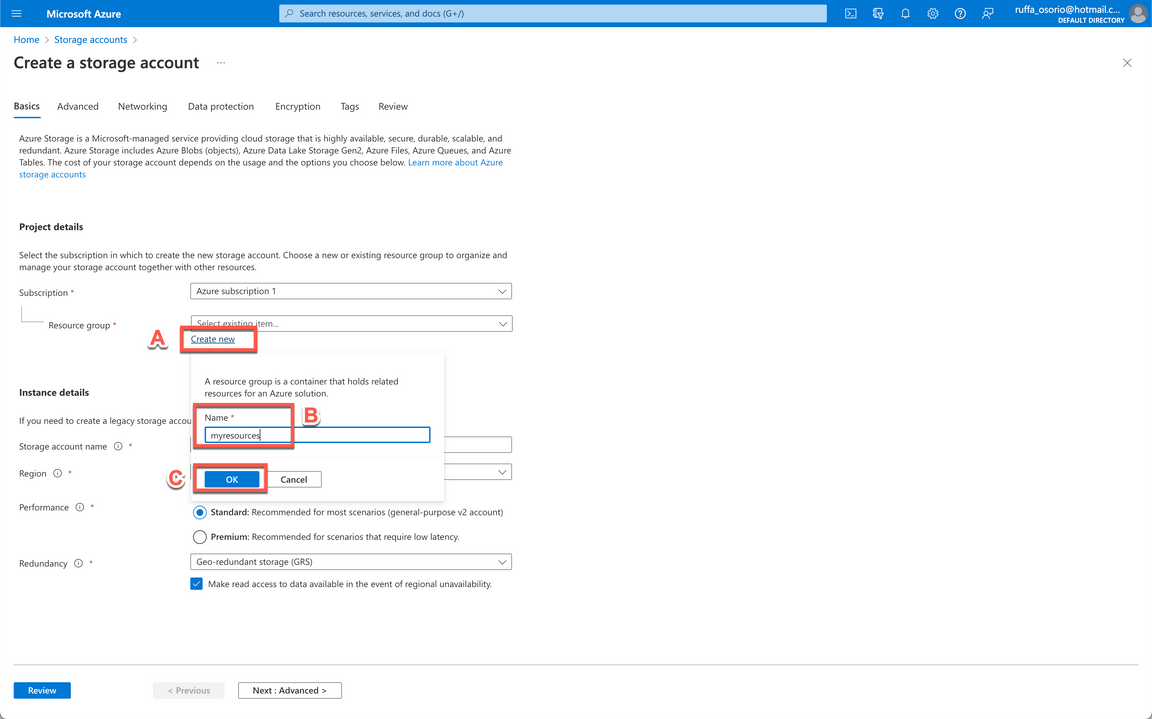
7.5 First, you need to select a Resource group. If you don’t have one, click Create new (A). Enter a name for your resource group (e.g.: myresources) (B). Then, click OK (C).
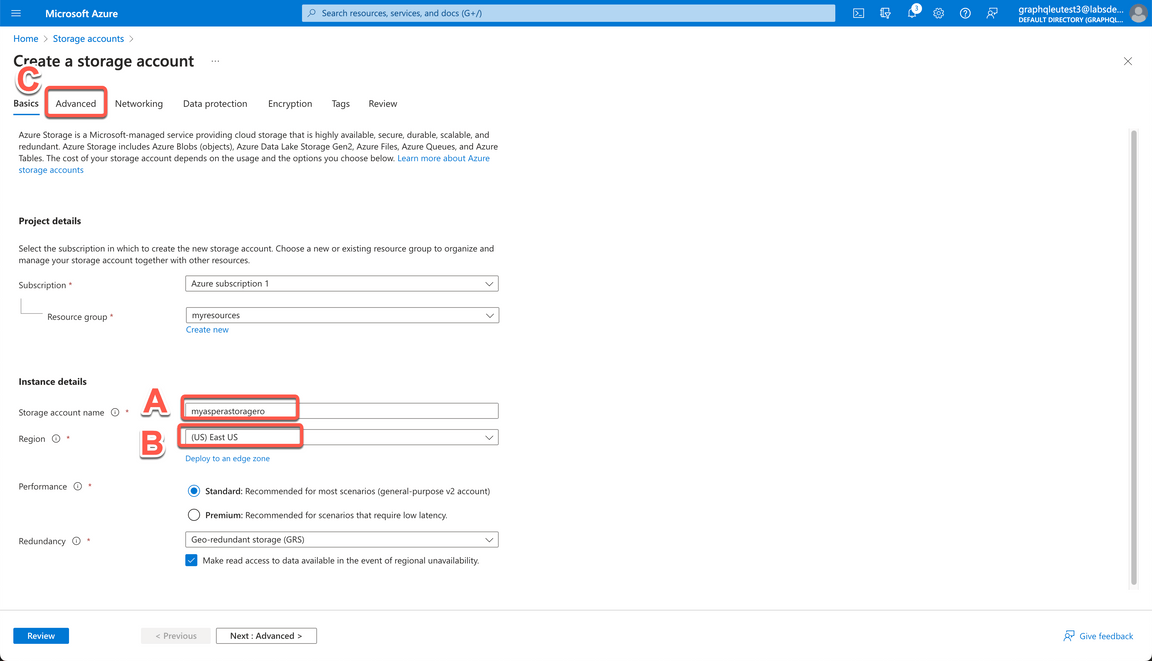
7.6 In the Storage account name, enter a unique name for your storage (A), don’t forget to take notes of this name, you will use later in the demo.
Your Azure storage must be in a region that is supported by the transfer service. To view the supported regions check here. For this demo, let’s keep (US) East US as Region (B).
Then click on Advanced tab (C).
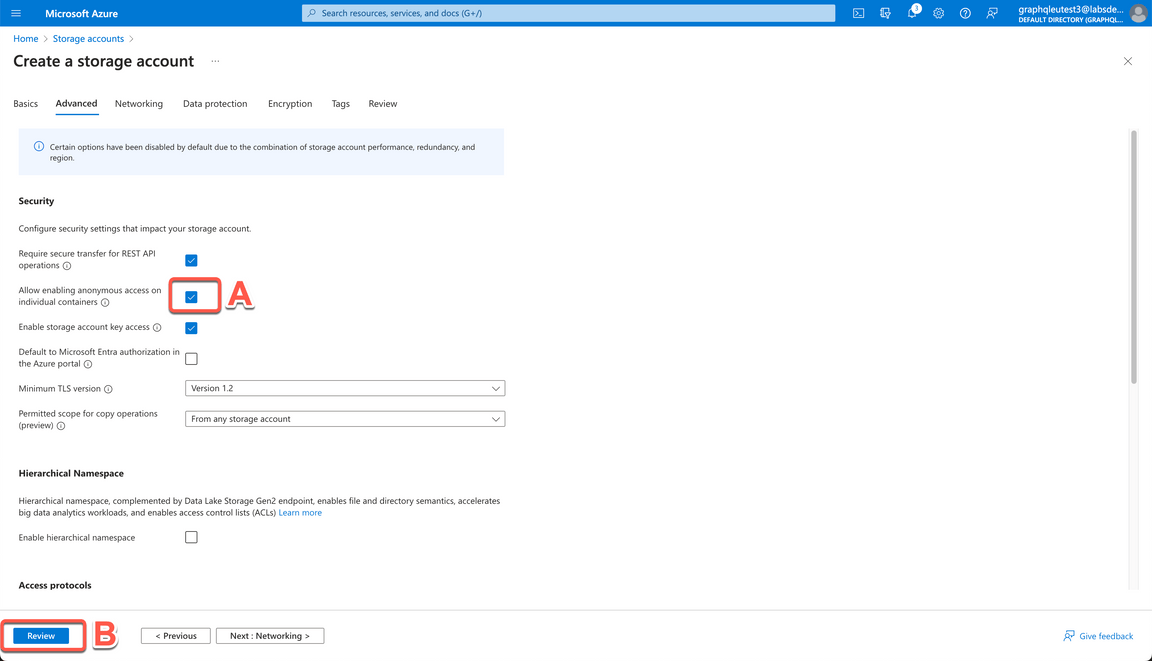
7.7 On the Advanced page, click on Allow enabling anonymous access on indiviual containers (A), and click Review (B).
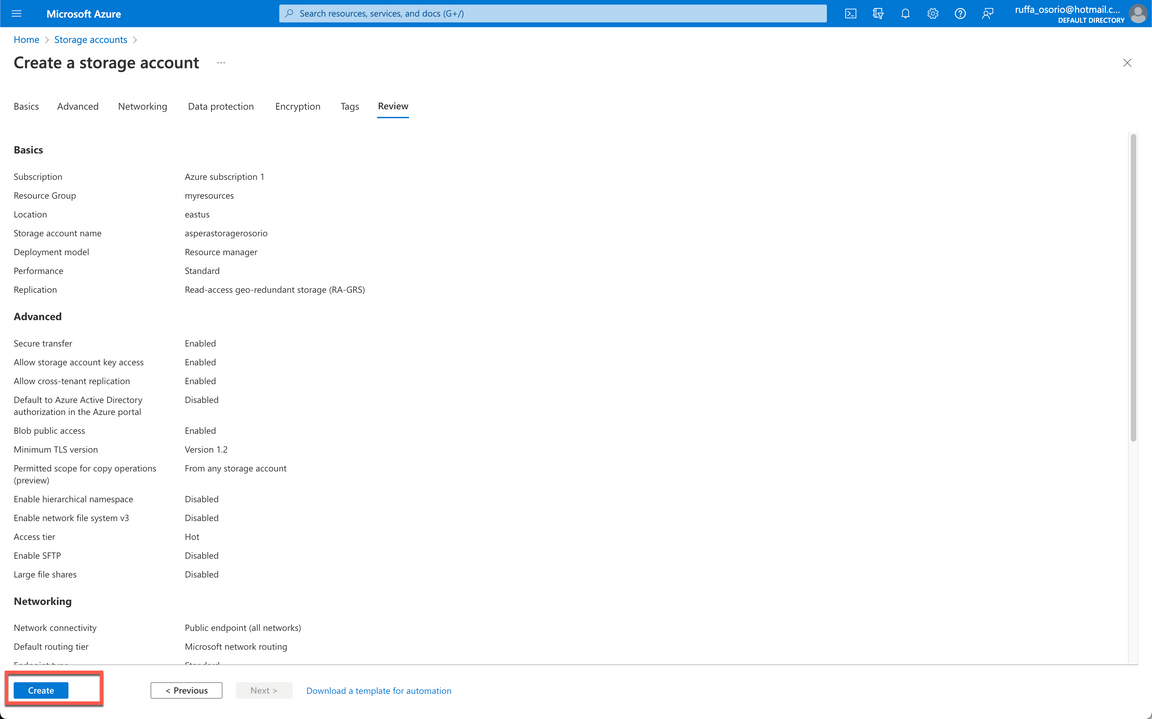
7.8 Wait few seconds for the review process is ready. When completed, click Create.
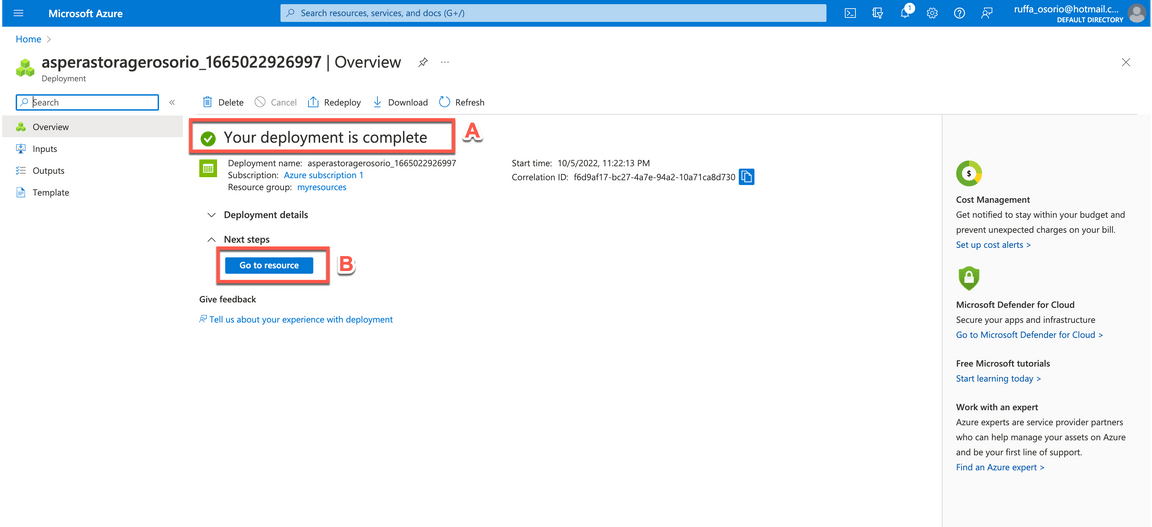
7.9 You need to wait few minutes to deploy your storage account. When your deployment is complete (A), click Go to resource (B).
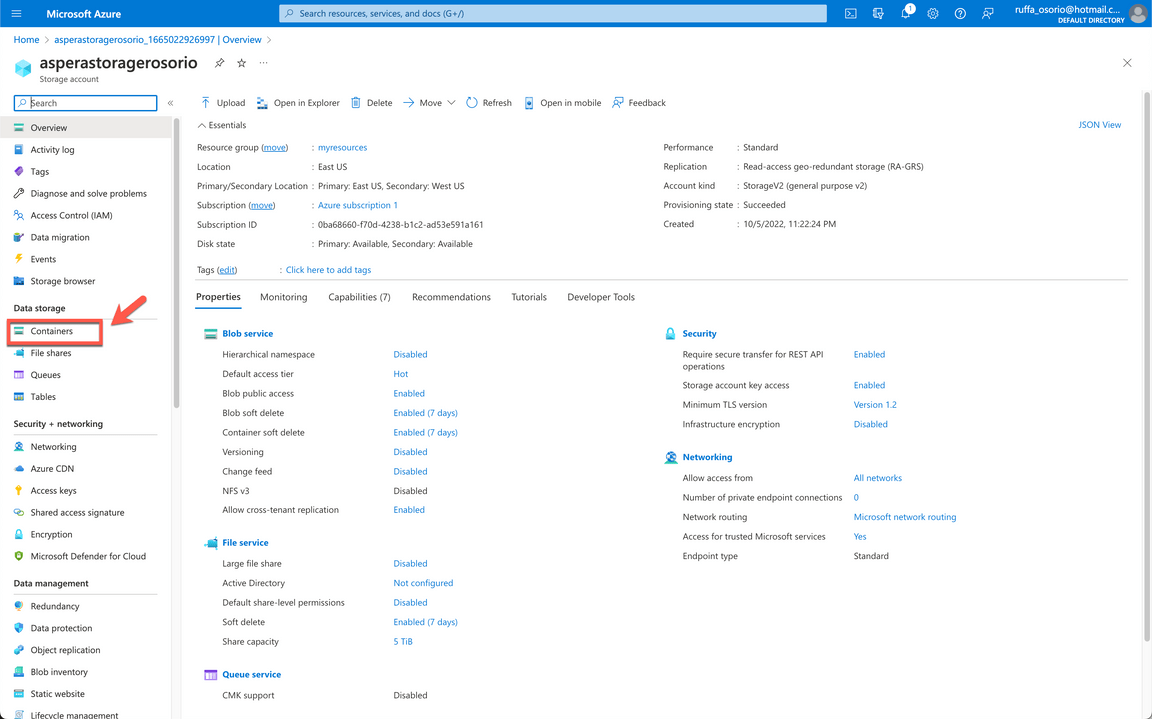
7.10 Now you need to create your Blob container. On Data storage section, click on Containers.
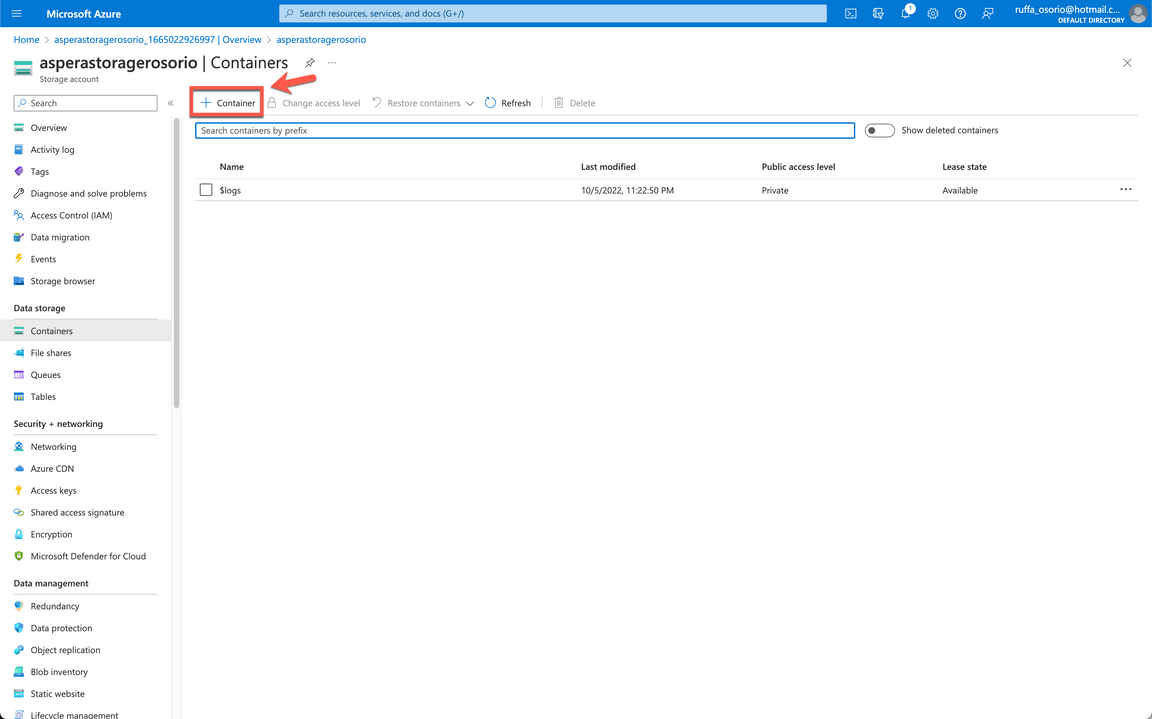
7.11 To create a new container, click on + Container.
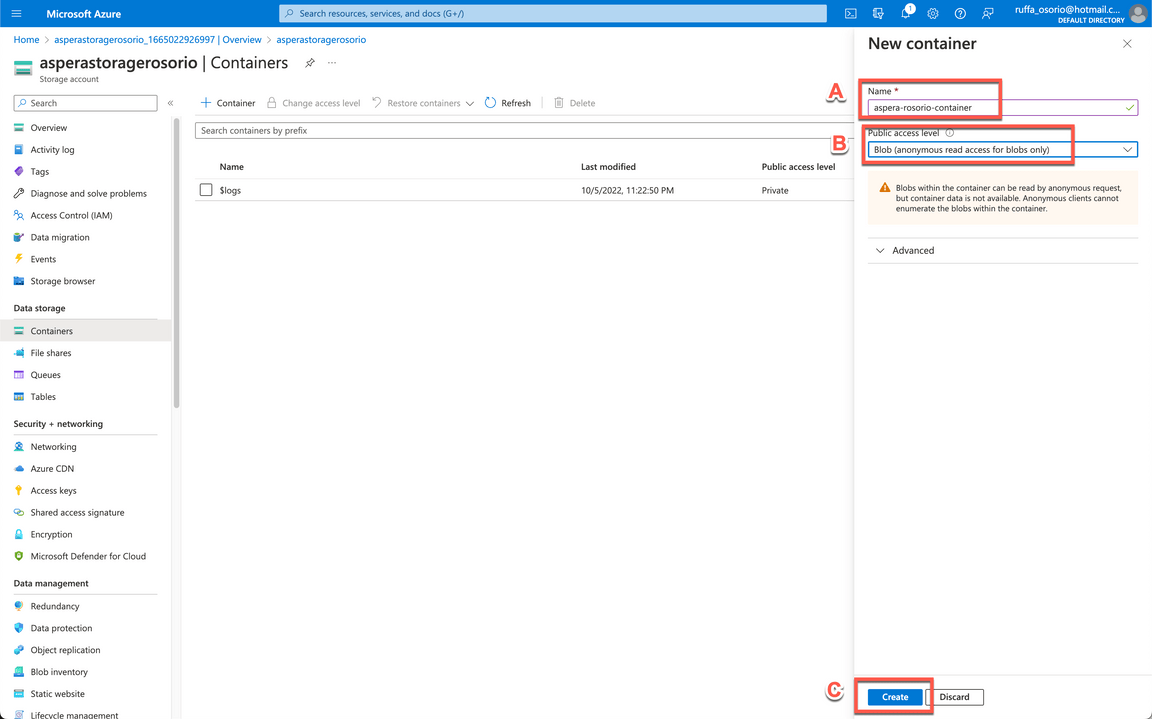
7.11 Enter a unique name for your container (A) and set Public access level to Blob (anonymous read access for blobs only) (B). Click Create (C). Don’t forget to take notes of your Container name, you will need that in the demo too.
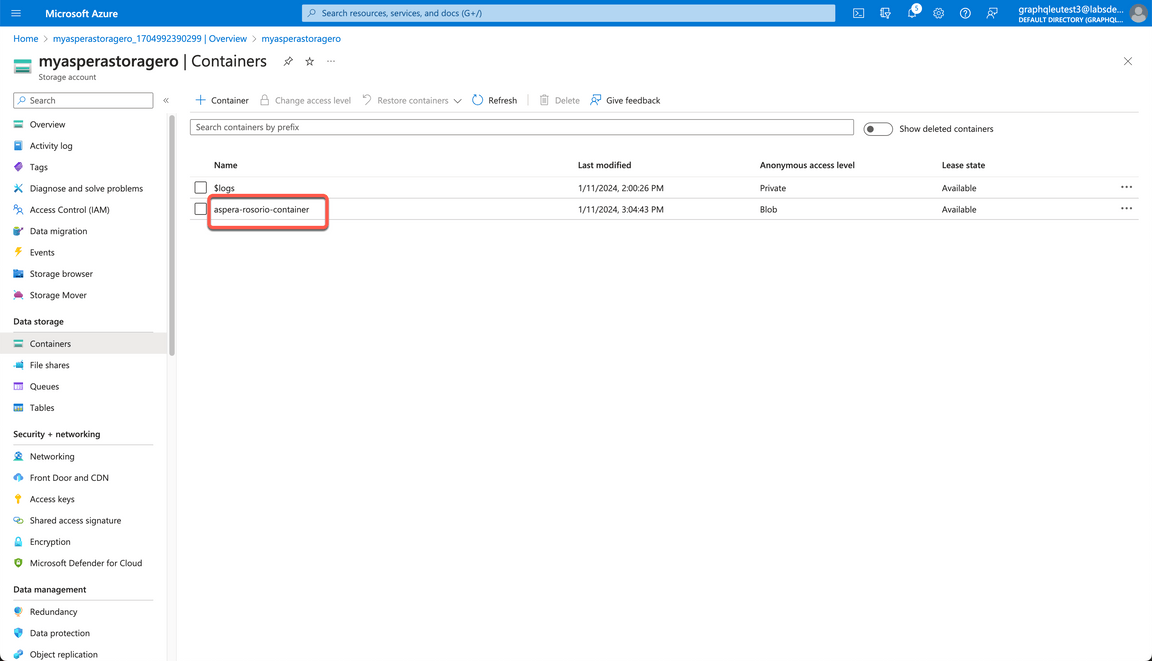
7.12 On the Containers view, click on your new Blob container to open it.
7.13 On Blob container, click Upload (A). Select a 10 Mb file (B) and click Upload button (C).

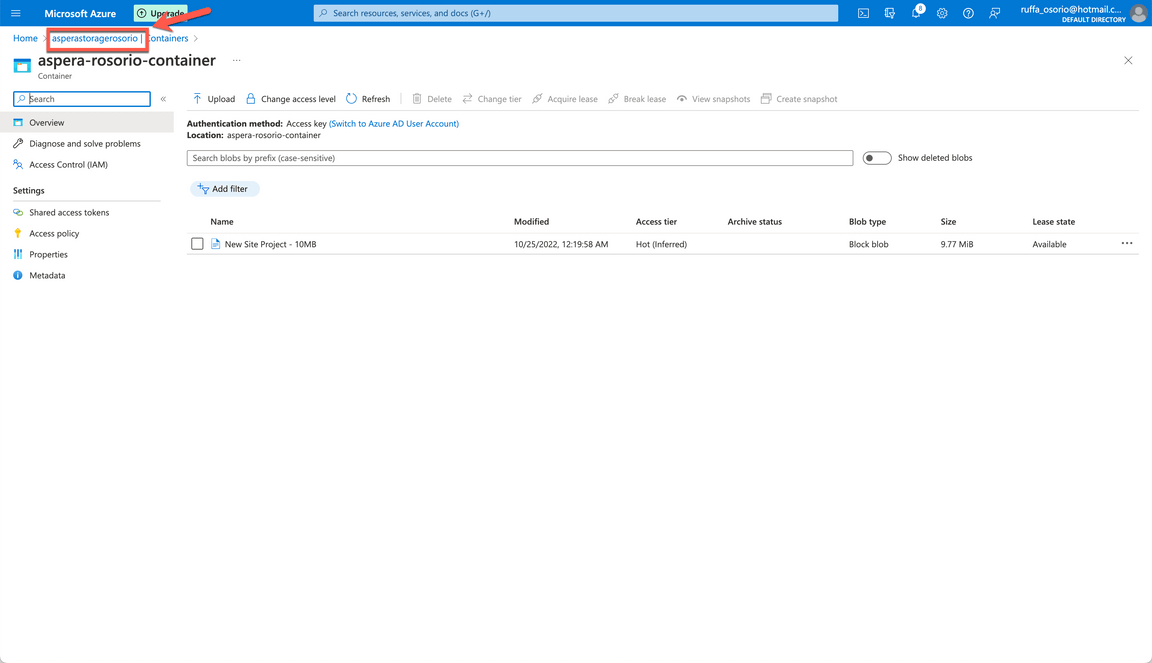
7.14 Let’s go back to the storage page. On the Breadcrumbs, click on your Storage name.
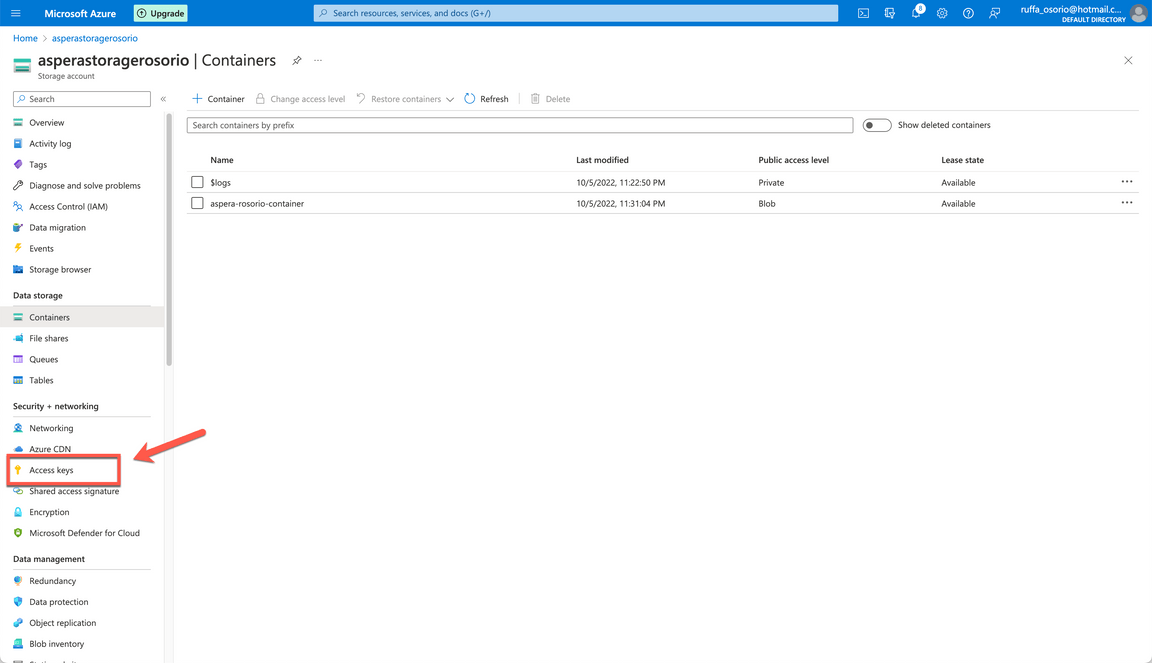
7.15 Click on Access keys.
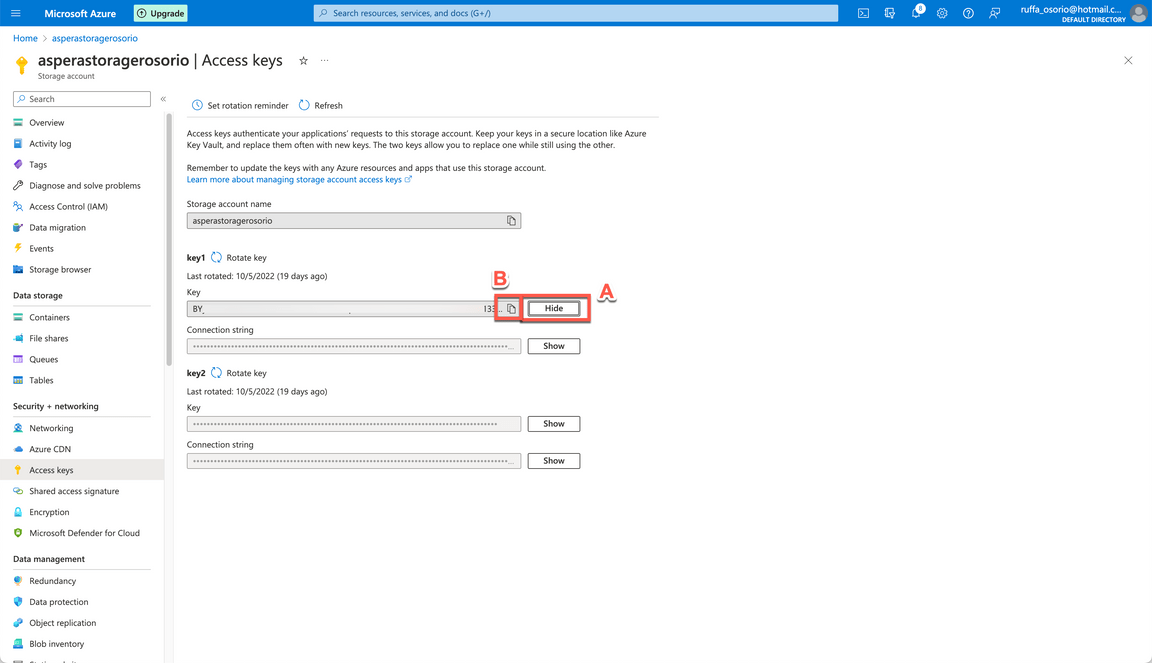
7.16 On key1 field, click Show button (A) and click Copy button (B) to copy the Key field. You will need that later in the demo to attach the Azure Blob Storage on Aspera on Cloud.
Great, your second object storage is ready for the demo.
8 - Copying Access Key and Secret of your built-in node
Each Aspera on Cloud subscription includes one built-in, Aspera-managed transfer server (ATS) node with storage in IBM Cloud Storage. The access credentials (or access key) for this transfer server are automatically delivered to the administrator who first created the AoC organization. You can see these credentials in a digital package from Tech Support in the Packages app. It’s very important to track and store these credentials securely so that you can access and manage content on this node. You’ll need this key/secret for certain administrative tasks during the demo. Let’s copy it!
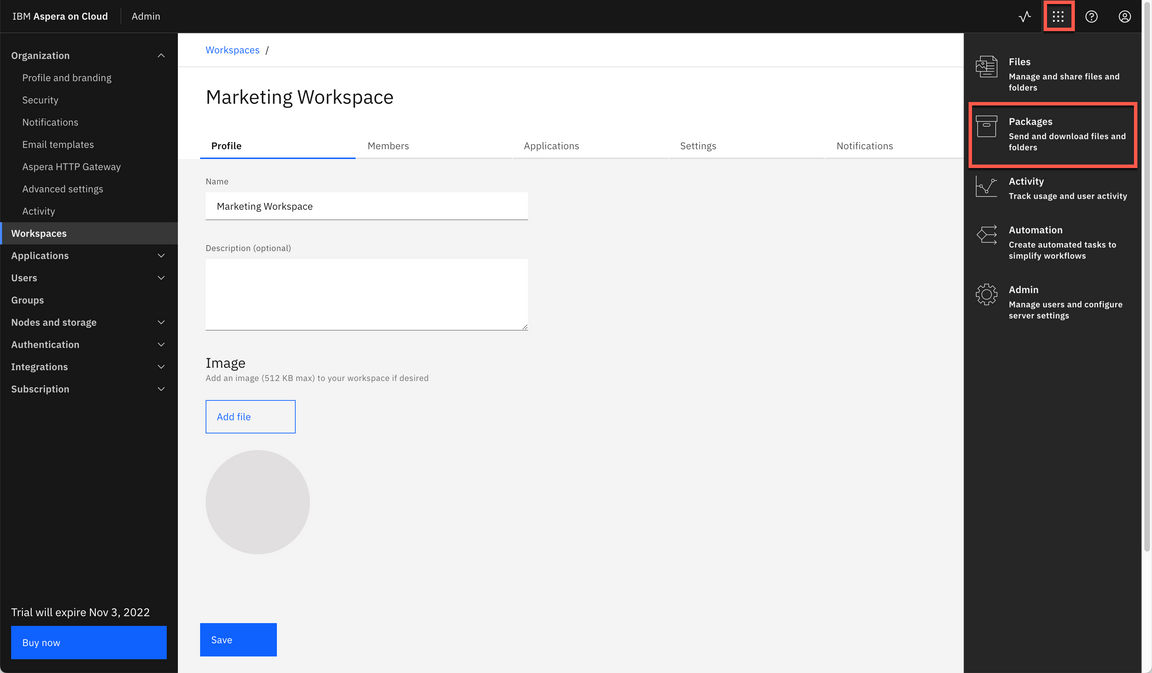
8.1 Back to Aspera on Cloud site, open the App switcher menu (A) and select Packages (B).
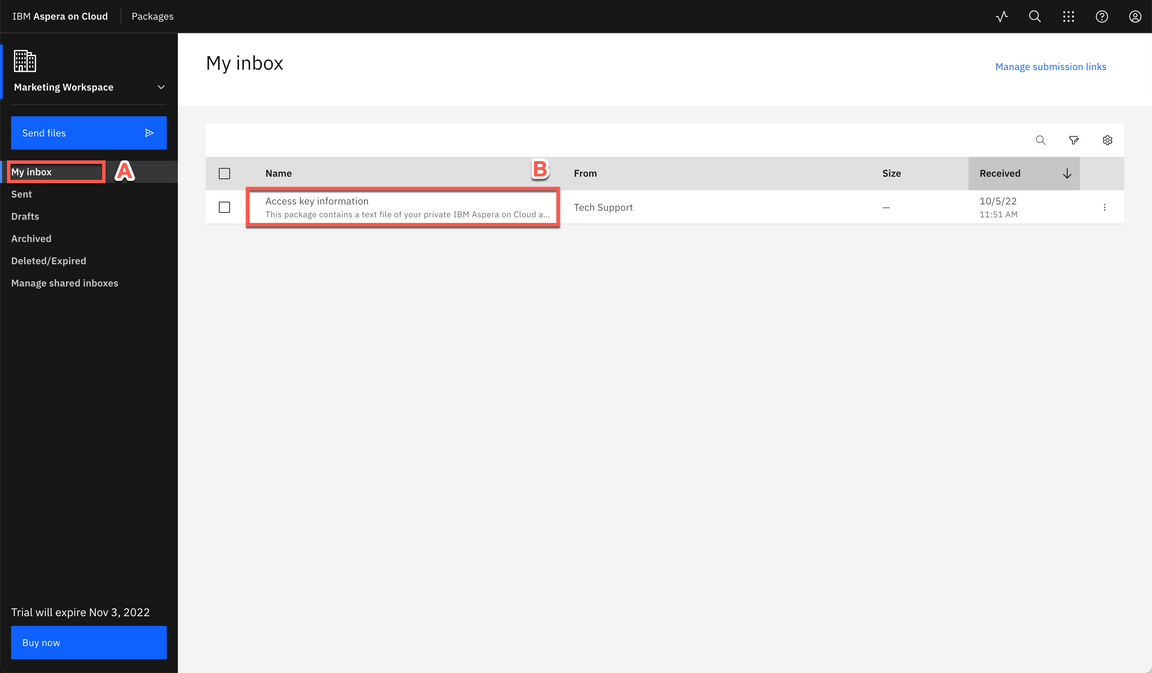
8.2 In My inbox view (A), you should have the Access key information package from Tech Support. Click on Access key information package (B).
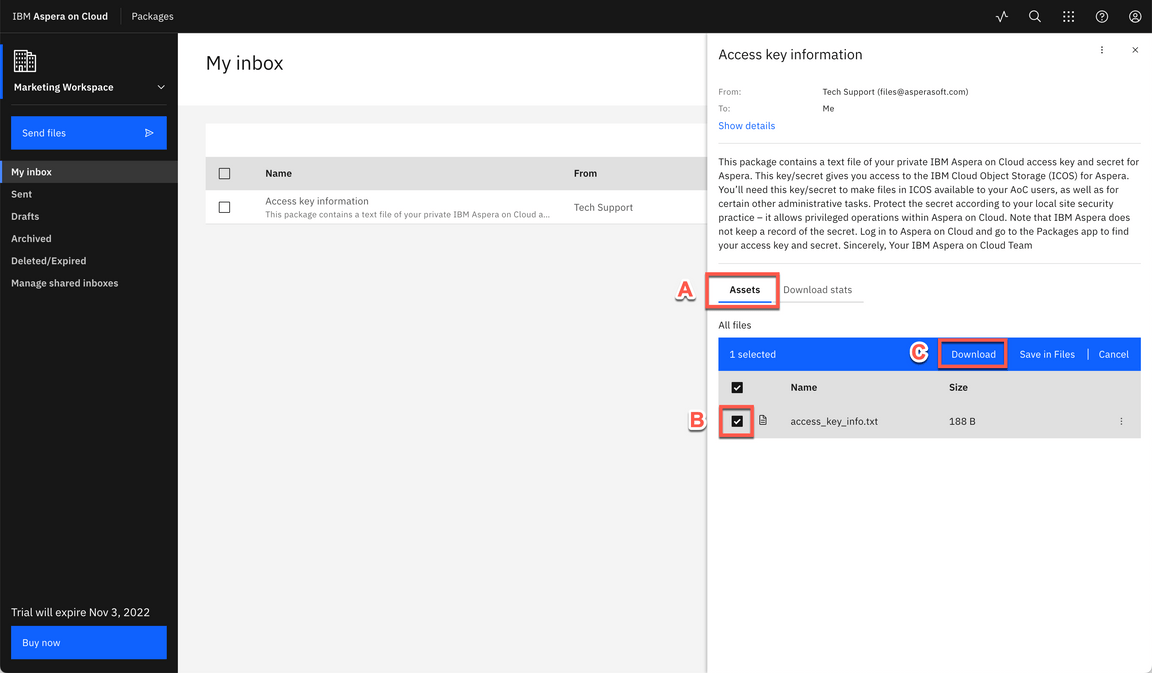
8.3 In the Assets tab (A), select the access_key_info.txt file (B) and click Download (C).
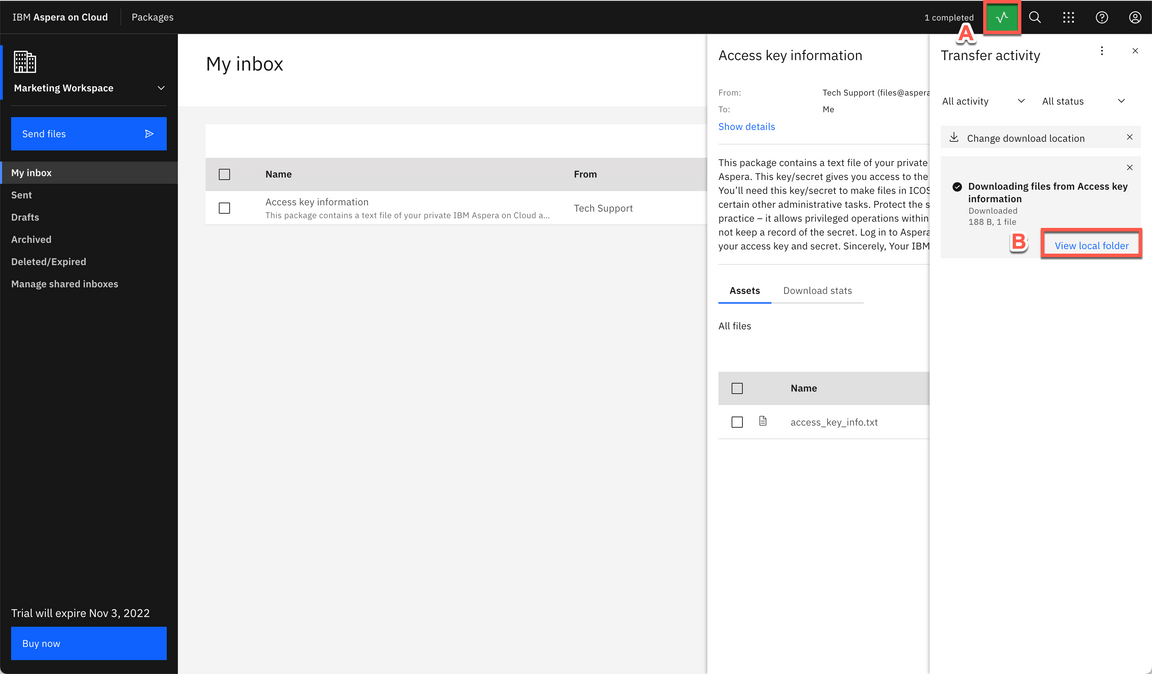
8.4 Open the Transfer activity dialog (A) and click on View local folder (B).
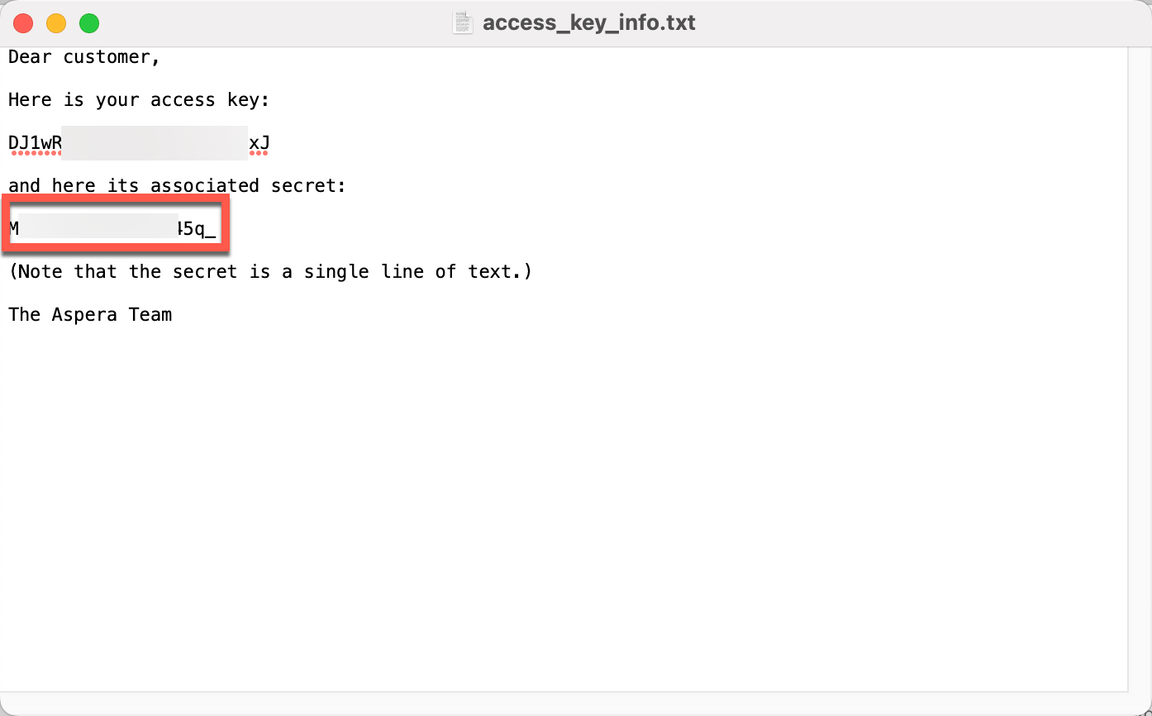
8.5 Open the file with a Text editor and copy the secret.
9 - Defining your Demo Users
During the demo, you will need to invite external users to access your files. We recommend to use a real external email (e.g.: gmail, hotmail, yahoo, …).
You can use your personal email. But a good practice is to create a fake demo user email (e.g.: fadams@gmail.com), and use different browser user profile to deliver your demo. For example, check here how to use chrome with multiple user profiles.
